
Unleash Claude for Legal

By the end of this post you will have a Claude that can pull a Fifth Circuit insurance case from CourtListener, brief it for you, stress-test the opinion for ambiguities, and drop the result into a PowerPoint — all from a single prompt. Vanilla Claude does none of that. Even Opus 4.8, the strongest model Anthropic currently ships, will hallucinate citations, cannot reach the actual case law you need, and has no built-in method for the analytical moves — case briefs, ambiguity audits, opposing-counsel review — that real legal work requires. A better model will not fix that. Customization will — skills, connectors, and plugins, configured for legal work. This post walks through the setup inside the Claude Desktop app, redesigned by Anthropic a few days ago. Fair warning: it is a bit of a slog. Many screens, many buttons, many diagrams. But once it is done, it is done, and you have a research and drafting environment no specialized legal AI product currently matches.
Claude Desktop is changing how you access added capabilities; this post describes the new interface. If what you see on your own screen doesn't match these instructions, wait a few days. Anthropic is rolling the change out gradually, and you'll likely have it soon.
Step 0: Use the Claude Desktop App
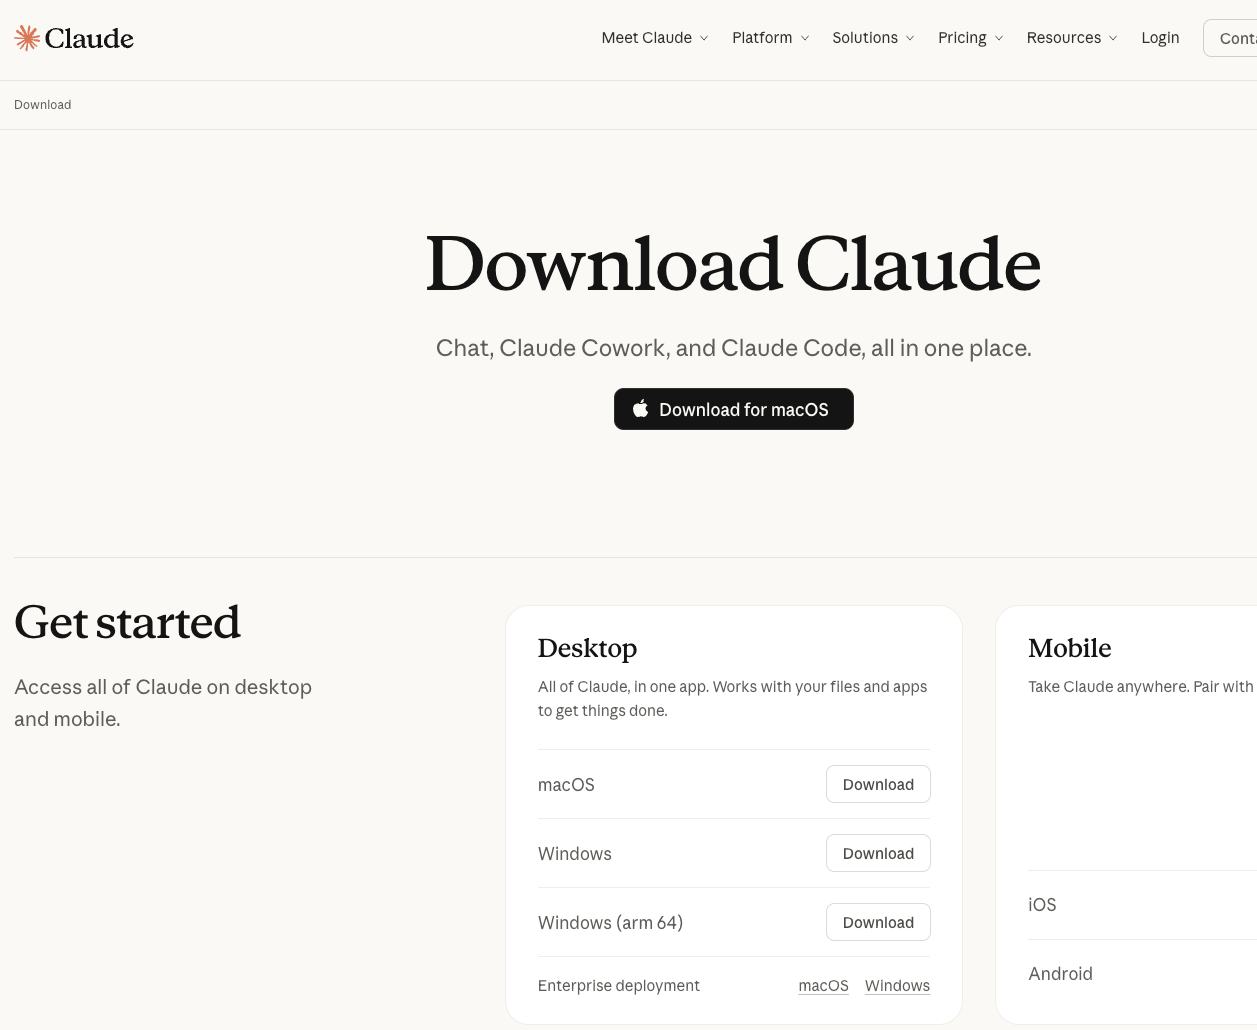
Some of what I am about to describe can be done using the web interface to Claude. But some of it cannot. To avoid the resulting complications, I am going to ask that you download and install the Claude Desktop app. Doing so will make this process and a lot of other Claude activities much easier. It runs on Mac, Windows, iOS, and Android.
Step 1: Understand the Concepts
Skills, Connectors and Plugins
Claude now has several different ways of adding capabilities. There are also “Apps” and “Extensions” for Claude, but I am going to set those aside because they do not work inside the Claude Desktop app. For present purposes, the important additions are three: skills, connectors, and plugins. There's also the notion of a marketplace.
Skills are instruction packages. A skill tells Claude how to perform a particular kind of task: follow a workflow, apply a checklist, write in a specified style, analyze a document in a structured way, or use a particular method. Skills can be acquired in several ways. Some basically come with Cowork and you don't have to do anything. They are built in. Examples are skills that work on various Microsoft Office files, skills that work on PDFs, or skills that perform deep research. You can get skills that are not built in from the Anthropic & Partners skill department, write them yourself inside Claude (not hard), or upload them from a file, also not hard. You can buy and sell skills or get them for free from third parties.
Connectors are different. A connector gives Claude access to an outside source, service, or system. Under the hood, connectors contain "tools": callable functions that let Claude search, retrieve, fetch, update, or otherwise interact with something outside the ordinary chat. You cannot readily write your own connector inside Claude or upload one from a file. For ordinary users, the practical route is to obtain connectors through the Anthropic & Partners connector department.
Plugins are a packaged bundle of Claude capabilities. A plugin may contain skills, connectors, or both. You can get plugins directly from Anthropic or from a "marketplace," either run by Anthropic itself or by third parties who host them on GitHub and with which you sync your Claude account. You can also upload a plugin directly from a file or – expert only – write one yourself inside Claude.
Interface Elements
It's also useful to understand the interface elements you are going to confront when attempting to customize Claude. Trust me, a little investment in the concepts will prevent fits of rage or tears later on. I'm going to identify the elements by name and number. I'm also providing a conceptual diagram.
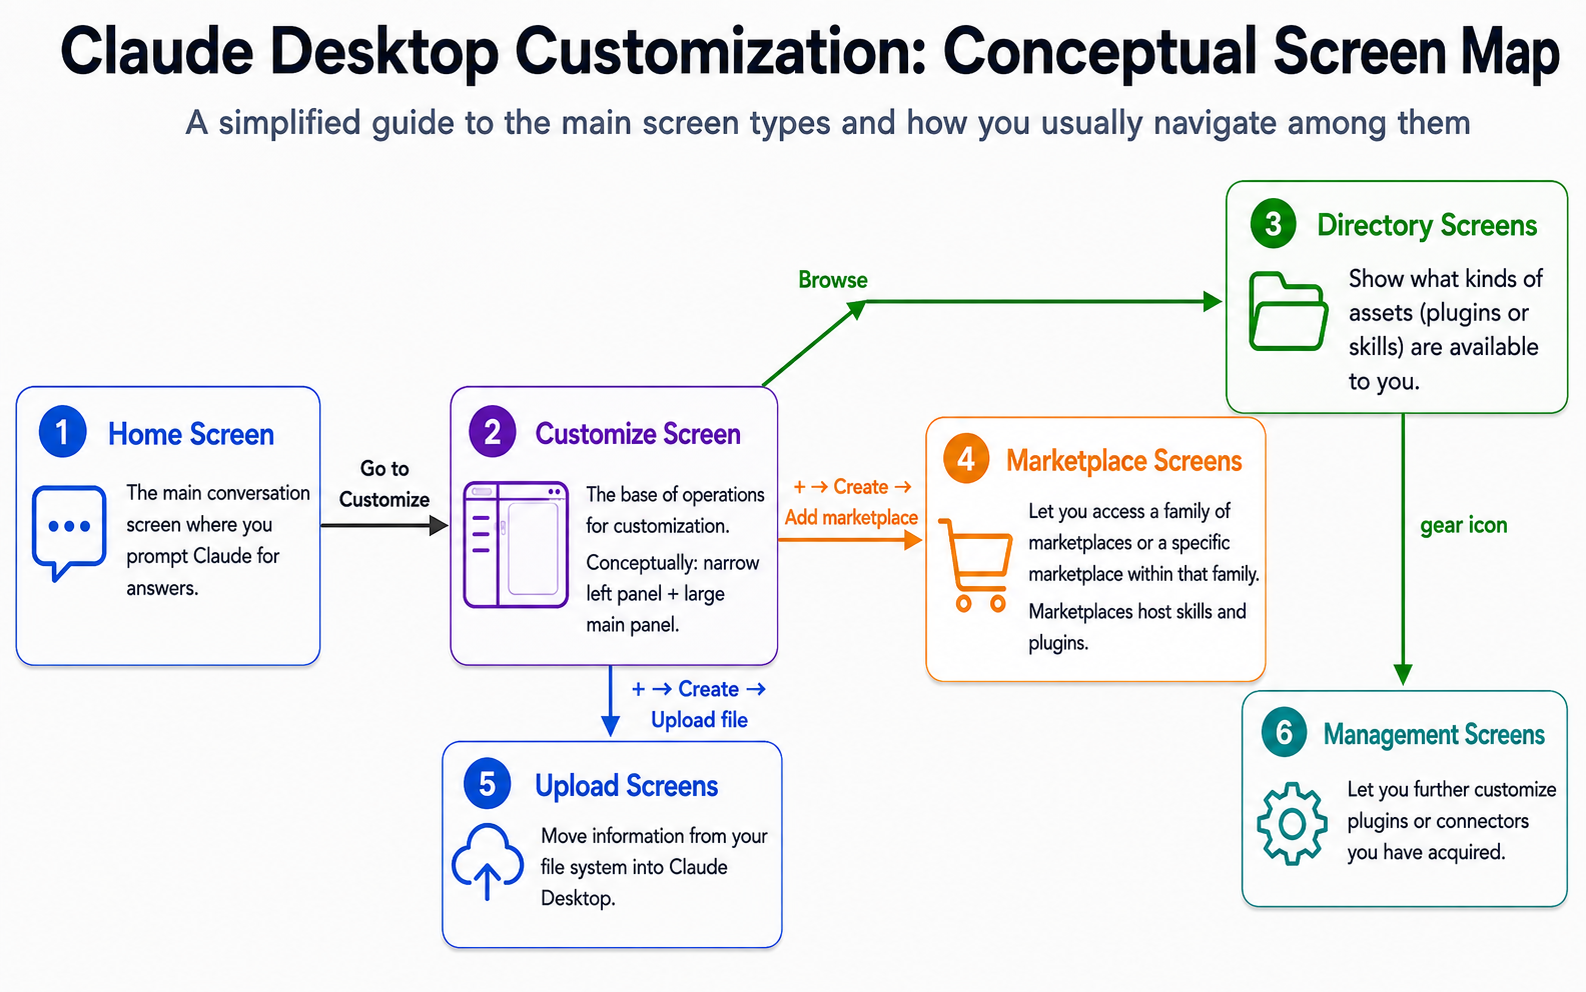
(1) The home screen. This is where you land when Claude Desktop launches. It has a main panel in which you enter prompts and a left panel that lets you do all sorts of things.
(2) The Customize screen. This is the base of operations for the sort of customization we are going to be undertaking here. It's a multi-panel screen: there's a narrow left panel and a large main panel.
(3) "Directory" screens. These let you see what kind of customizations are available to you. Usually, you get to a Directory screen by asking to "browse."
(4) Marketplace related screens. These screens either let you access a particular family of marketplaces (things that host skills and/or plugins) or that let you access a specific marketplace from within that family. Usually you get to a Marketplace screen by pressing a "+" button and then following it with a "Create <something>" button and then an "Add marketplace" button.
(5) Upload screens. These screens let you move information from your file system into Claude Desktop. Usually you get to these screens by again starting with a "+" button but this time following it with an "Upload file" button.
(6) Management screens. They let you further customize plugins or connectors that you have acquired. Usually you get to a Management screen from a Directory screen, often by clicking on a gear icon.
What actually is "Claude for Legal"
Claude for Legal is a somewhat ill-defined term. It refers not to a single product, but to a loose collection of capabilities: a newer marketplace for plugins and connectors that is itself confusingly called Claude for Legal, an earlier marketplace-like set of tools, and a growing set of connectors that expose legal tools. The account requirements vary as well. Some capabilities, including the Claude-for-Legal marketplace plugins, can be used with the same Anthropic account you use all the time; no separate external account is required. Other aspects of Claude for Legal depend on third-party services such as CourtListener and Lawve. They therefore require the user to create or connect an account outside Anthropic, including, importantly, a free GitHub account.
Step 2: Getting The Non-Marketplace Plugins
Let's start with acquiring plugins without even having to use a marketplace. To do so, we want to get as directly as possible to a Directory screen.
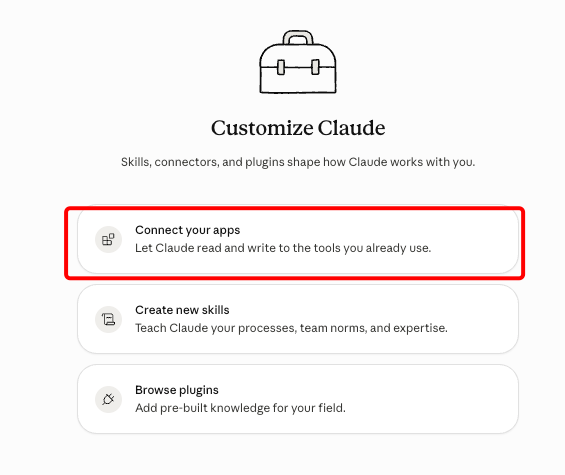
From the left panel of the Home Screen, click on Customize. That takes you to a Customize Screen that has a left side panel and a main panel. The left panel has essentially three navigation items: Skills, Connectors and Plugins. The main panel has three big buttons: "Connect your apps", "Create new skills", and "Browse plugins."
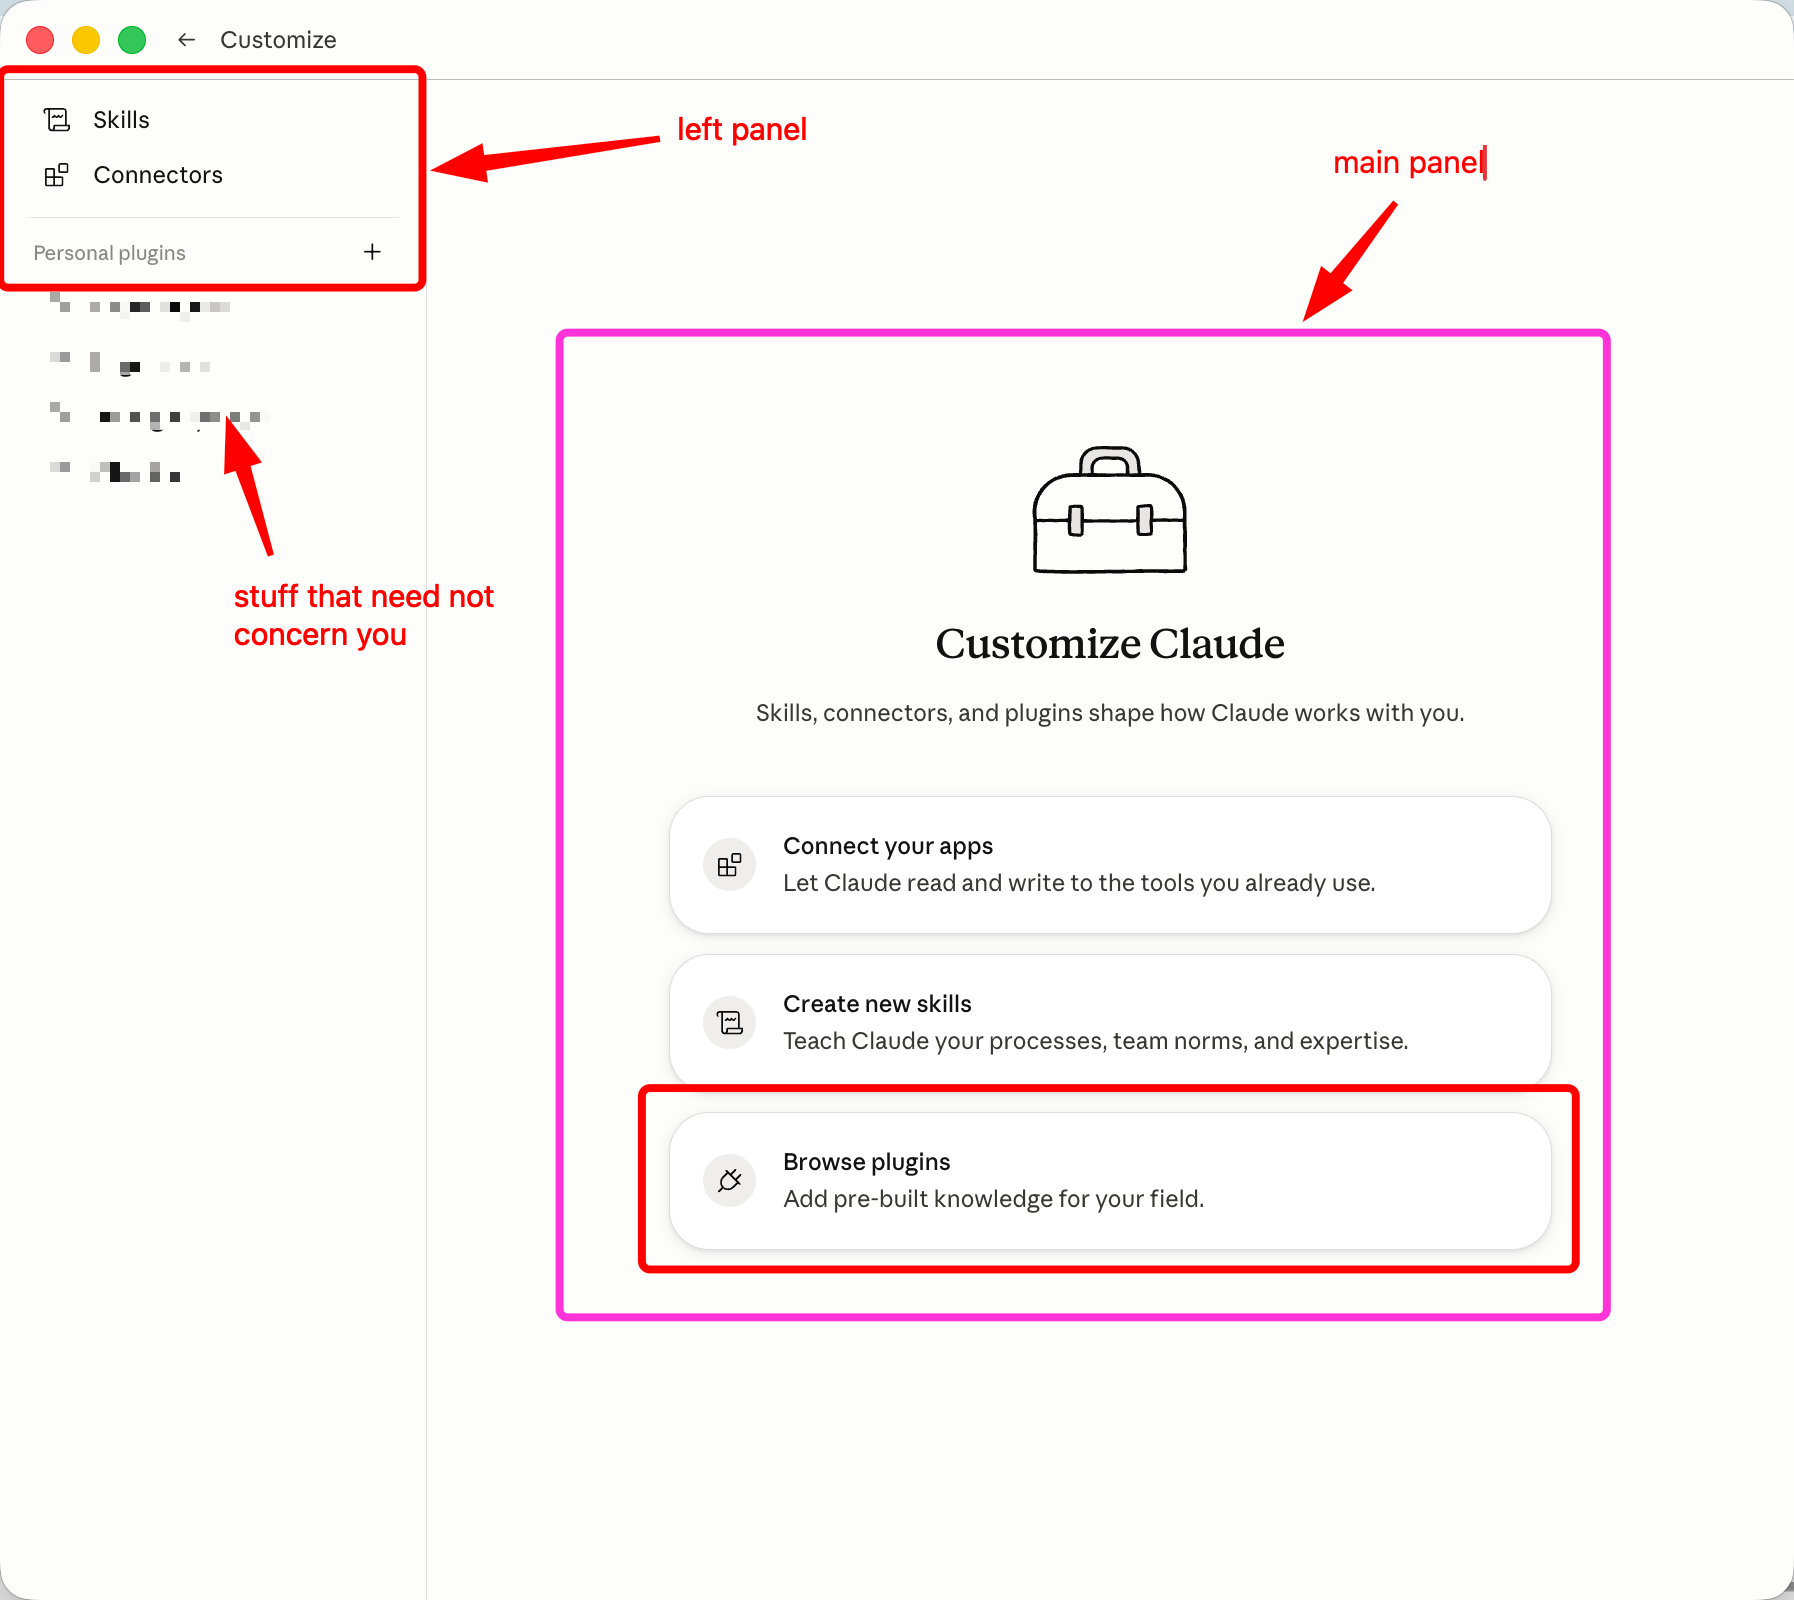
Press on the big "Browse plugins" button in the main panel. (I've put it in a red box). This takes you to a Directory screen with navigation elements on the left panel for skills, connectors and plugins that are potentially available to you. You should see the "Plugins" navigation element selected for you and a bevy of plugins from Anthropic & Partners available to you.
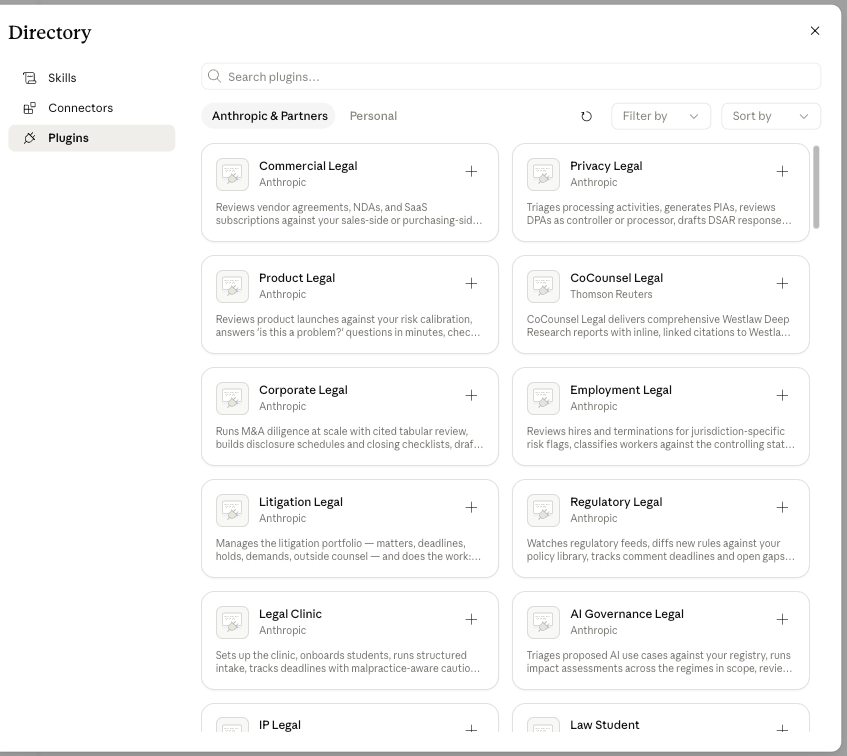
You can get all sorts of plugins here, some relating to law, many relating to other fields. but let's pick up three relating to law. First, click on "Law student." That takes you to a screen that describes the plugin. You'll see it lists a number of skills such as /case-brief, /irac-practice, and /socratic-drill as well as a number of connectors it makes available including CourtListener, which lets you ground interactions in real case law.
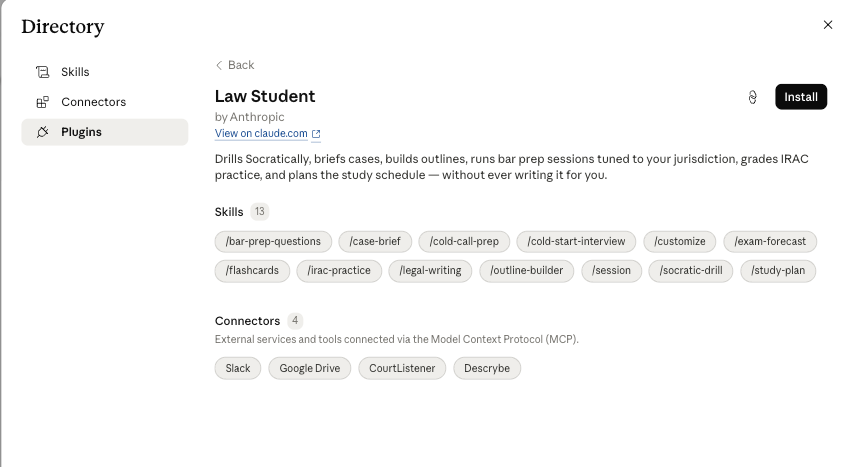
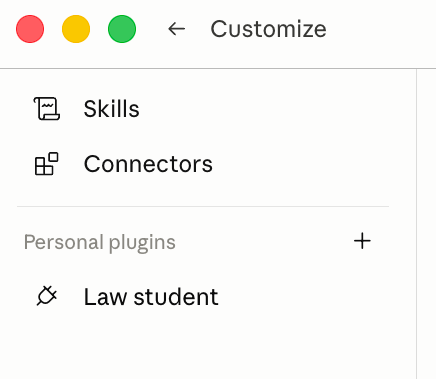
Click on the "Install" button. After a moment or two, the plugin is added and the Install button morphs into a "Manage" button. Were you to click on Manage at this point you would head to a Management screen, but I'm going to defer discussion of plugin management until later. Exit out of the Directory screen and you should be back at the Customize screen. Notice that the left panel now lists Law student as a "personal plugin."
Now repeat the process to add the Legal Clinic plugin. Remember the steps. Hit the big "Browse plugins" button from the main panel of the Customize screen. Notice that Law Student now has a gear icon next to it, instead of the "+" icon, indicating that it is installed and available for management. Click the Legal Clinic button. (Scroll down or use the search bar if you don't see it at first). You should see its installation screen.
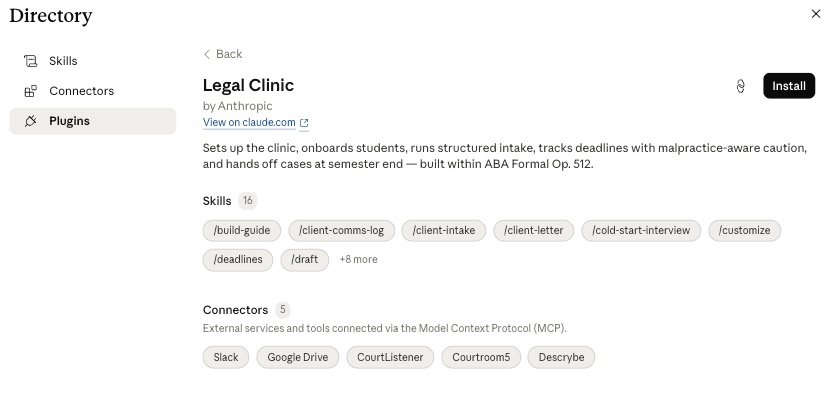
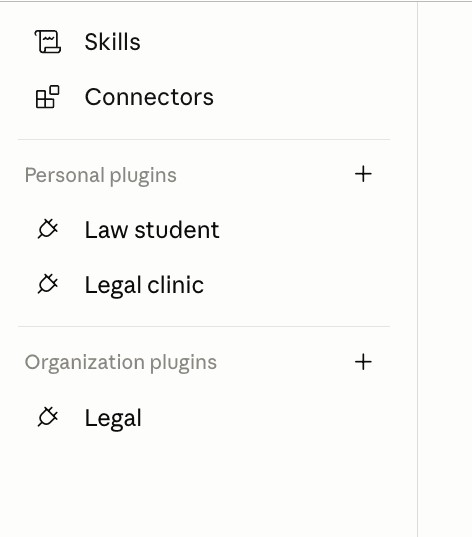
Notice the skills included in the plugin, including /cold-start-interview and /client-intake and the connectors included such as CourtListener and Courtroom5 (which helps pro se litigants). Install it. Repeat the process for the "Legal" plugin or whatever other plugins suit your desires. For whatever reason, the "Legal" plugin is deemed an "Organizational plugin" rather than a "Personal plugin" by Claude, but that doesn't seem to make much difference except that you can't currently upload an organizational plugin or create one yourself from within Claude. Here's what my left panel of the Customize screen looks like after this process is completed.
Step 3: Acquiring Marketplace Plugins
That was the easy part. We acquired plugins without going through a "marketplace." But that workflow limits us to plugins vetted by Anthropic itself. We might want to live a little more dangerously. There's a big world of plugins (and skills and connectors) out there that we might want to bring into Claude Cowork or Claude Code (on the desktop app). One way to get them and keep them auto-updated is to acquire them through a "Marketplace." In particular, we might want to acquire them through a marketplace maintained on GitHub. I will call such destinations "GitHub Marketplaces."
STOP! Do not read Step 3 any further unless you already have a GitHub account. You won't be able to access plugins from a GitHub marketplace. Fortunately, getting a GitHub account is free and easy. Follow the instructions in the Appendix and then resume reading.
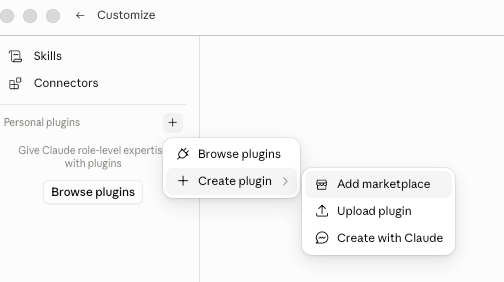
To add a GitHub Marketplace in which we can shop for plugins, get yourself back to the Customize screen. But this time don't leap to press on the tempting big Browse plugins button. We need to get to the Marketplace screens first. Instead, click on the "+" button to the right of the "Personal plugins" label in the left panel, then click on "Create plugin" and then click on "Add marketplace."
If all goes well, you should see the "Add marketplace screen."
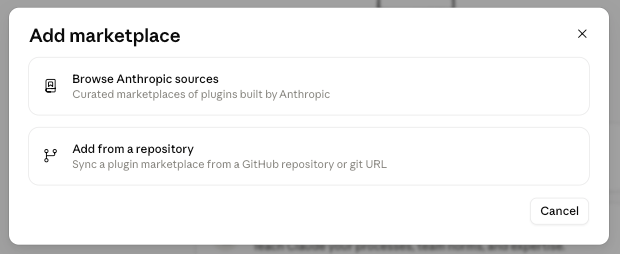
Click on the "Add from a repository" button. You should then see the GitHub Add Repository screen. Please read that warning carefully. If I were an evil malware developer, I might well stick nasty instructions inside a plugin. Make sure you trust the developer before you start installing GitHub plugins. Assuming you surmount that hurdle, click the "Select a repository" button and either select a pre-cached repository name or type in a repository name. I'm going to type in one you can trust for sure: sethchandler/claude-marketplace.
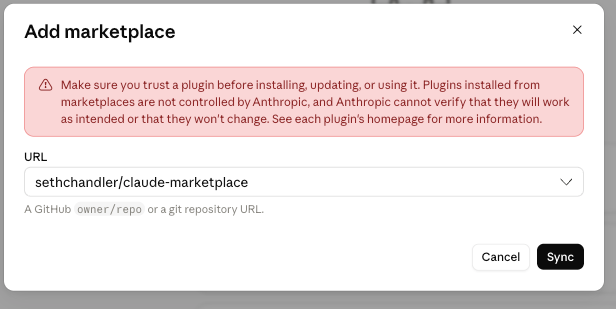
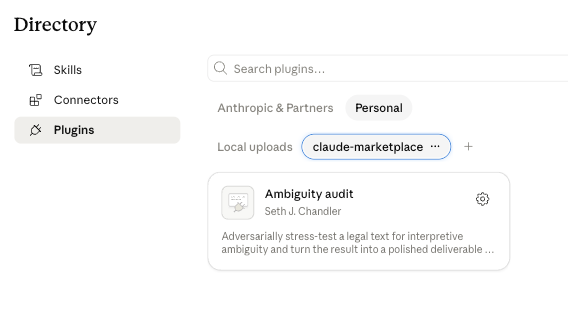
Now press the Sync button. Be patient. The syncing process can take a minute. And sometimes, if the third party hasn't written their marketplace files to the exacting specifications of Anthropic, the sync will fail. But, if all goes well, within a minute or so you should be taken to the Directory screen, into the "Personal" wing and you will see both a new marketplace added and a list of plugins available from that marketplace.
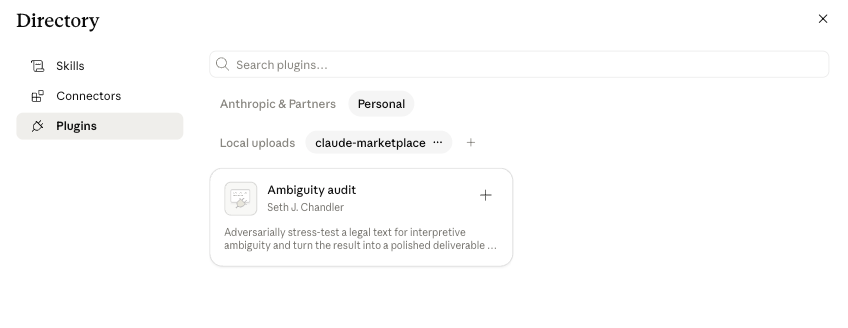
Here you can see we have added the claude-marketplace marketplace, which contains the Ambiguity-audit plugin, which is visually represented as a kind of plugin card. Note: we have not yet actually added the plugin to Claude. We have only made it potentially available. To add it, click the "+" button at the top right of the Ambiguity audit card. The "+" icon should morph into a gear icon and you should receive a happy message indicating that the plugin is installed and ready to use.
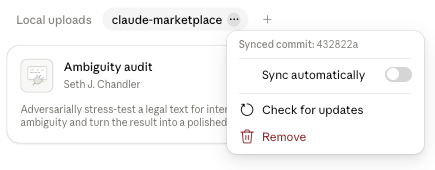
There are three features of the Directory screen worth noting at this point. First, do you see the tiny three horizontal dots to the right of "claude-marketplace"? If you click on them, you get to a menu that lets you remove the marketplace altogether or sync it.
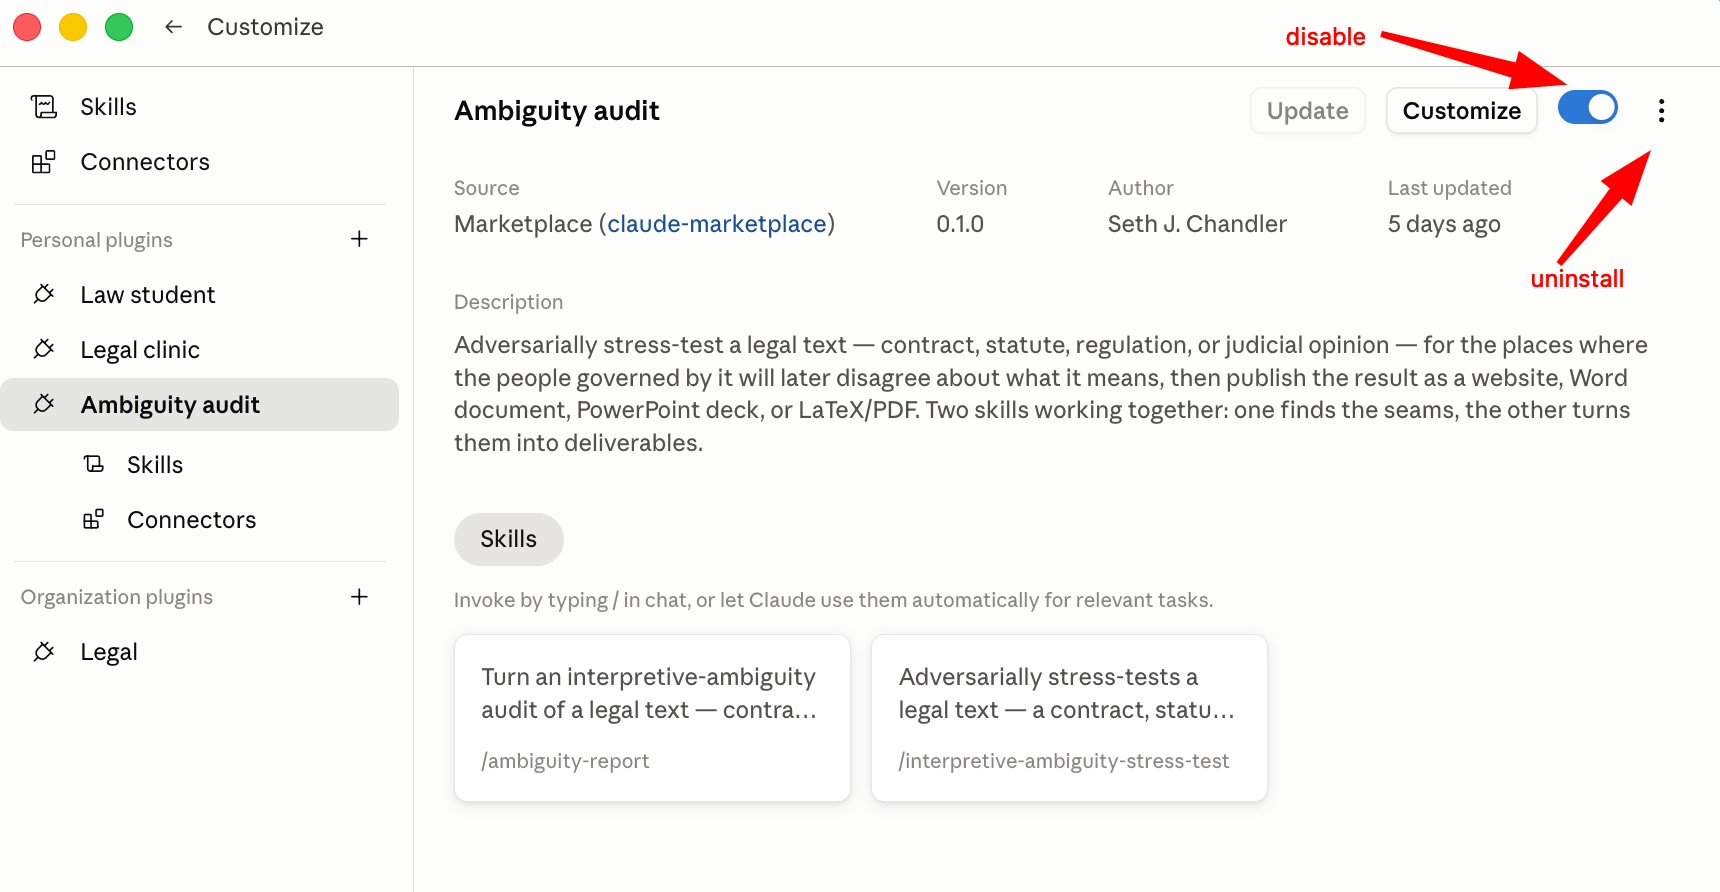
Second, if you click on the gear icon for the plugin card itself (but not its gear icon), you will be taken to a Management screen that lets you disable the plugin or (using the vertical three dot menu) uninstall it. The Management screen also tells you about the assets the plugin provides. Here there are two skills: /ambiguity-report and /interpretive-ambiguity-stress-test. There are no special connectors as yet built into the plugin. You will also see the left panel of the Customize screen has now added Ambiguity audit to its list of Personal plugins.
To find other marketplaces with plugins, you can use the claudemarketplaces.com website.
Step 4: Uploading plugins
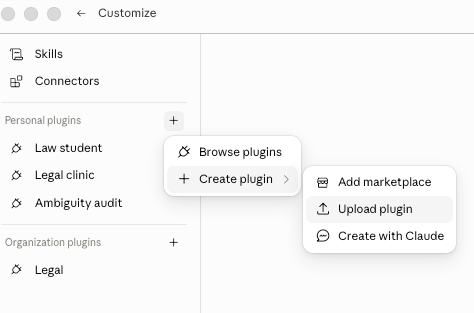
There's at least one more way to get a plugin: upload it from your local file system. In theory this is simple. Go back to the Customize screen, click the "+" button next to Personal plugins, click Create plugin, and click on Upload plugin.
You'll get an upload screen like this. Again, actually pay attention to the warning. An uploaded plugin from a negligent or malicious actor can do a lot of damage.
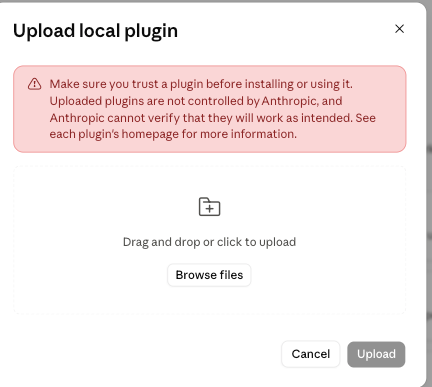
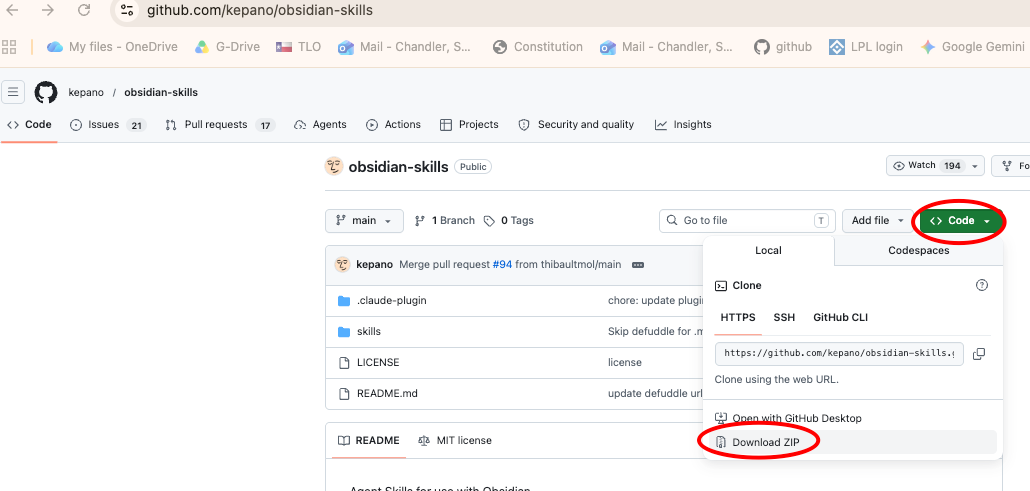
And then just upload an "appropriate" .zip or .plugin file from your file system. Where do you get such files? Ah, that's the tricky bit. But one way to do so is to go to a GitHub repository containing a plugin and download it as a .zip file. Here you see me doing so in order to obtain a plugin that lets you interface with an Obsidian vault.
Now upload the zip file by searching your local file system for the file you just downloaded from GitHub. And press the "Upload" button.
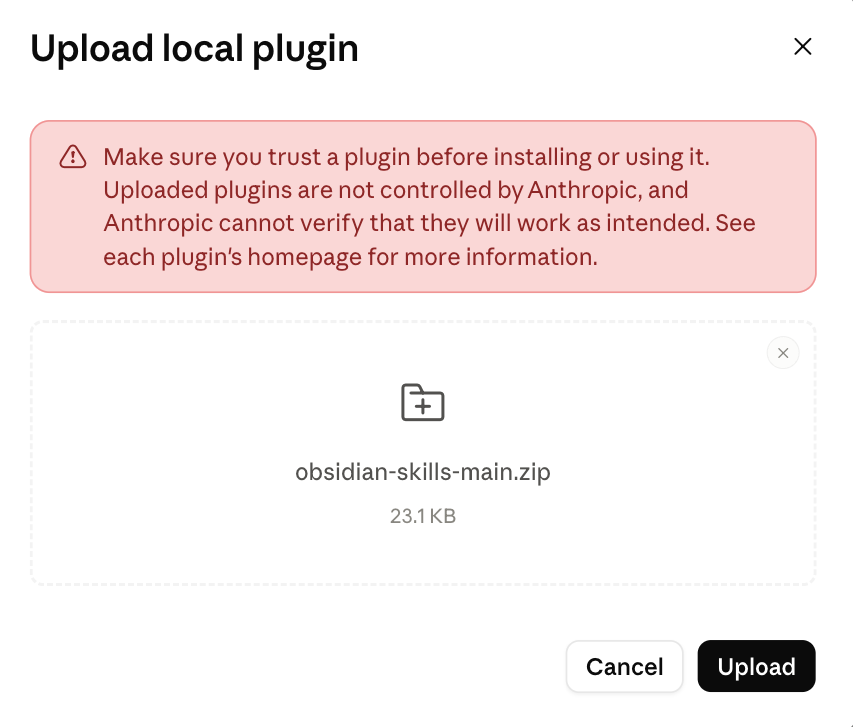
If all goes well, you are taken to the management screen for the newly installed plugin. And notice that Obsidian has been added to the list of my Personal plugins.

Step 5: Preparing for Connectors
To make the best use of Claude when doing legal work, you need connectors to external services. Before they will work, however, a little preparation is required. Connectors reach outside Claude to interact with external services, and those services usually require an account. Some accounts are free; others are not. I will focus on two connectors that are part of Claude for Legal: CourtListener and Lawve. Both require account setup, but the process is straightforward and resembles the account-creation routines that, by 2026, have become familiar across most online platforms.
CourtListener
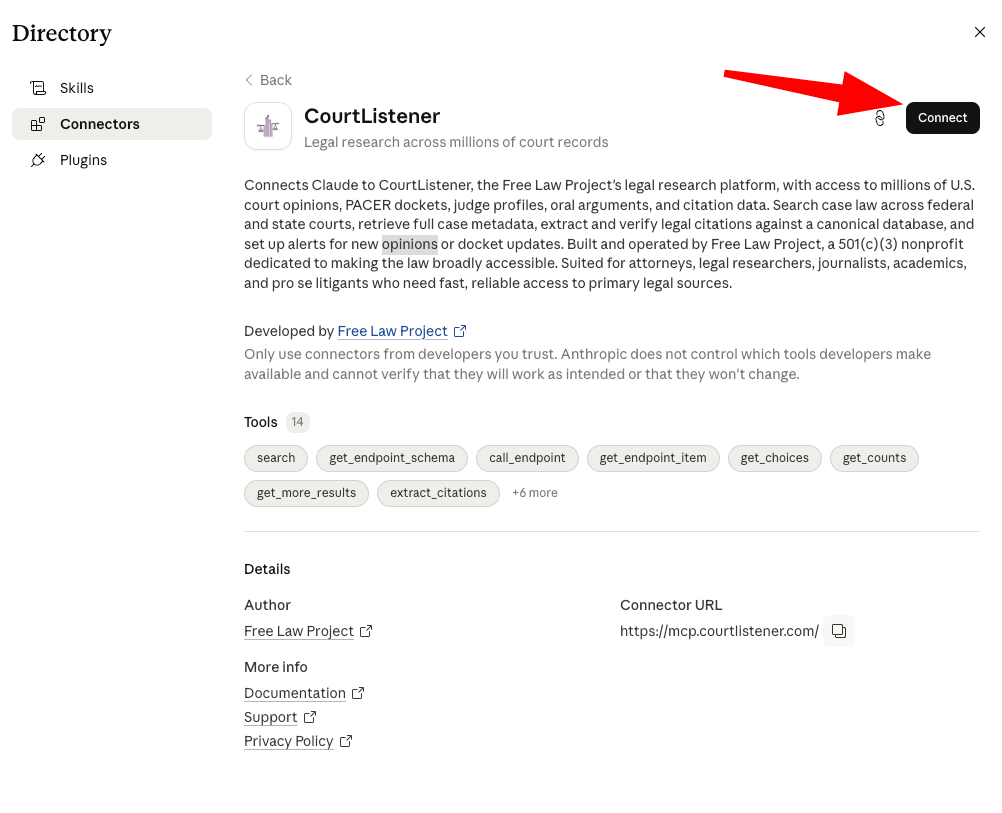
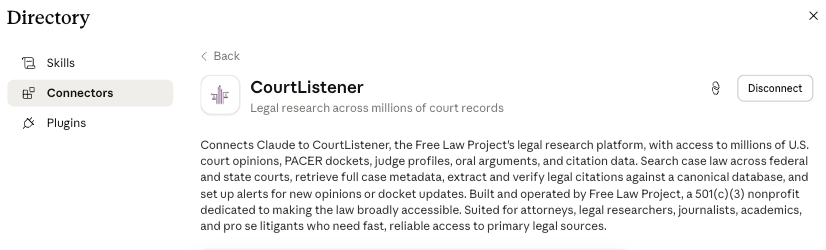
CourtListener — is officially described as the Free Law Project's legal research platform, with access to millions of U.S. court opinions, PACER dockets, judge profiles, oral arguments, and citation data. Search case law across federal and state courts, retrieve full case metadata, extract and verify legal citations against a canonical database, and set up alerts for new opinions or docket updates. Built and operated by Free Law Project, a 501(c)(3) nonprofit dedicated to making the law broadly accessible. Suited for attorneys, legal researchers, journalists, academics, and pro se litigants who need fast, reliable access to primary legal sources.
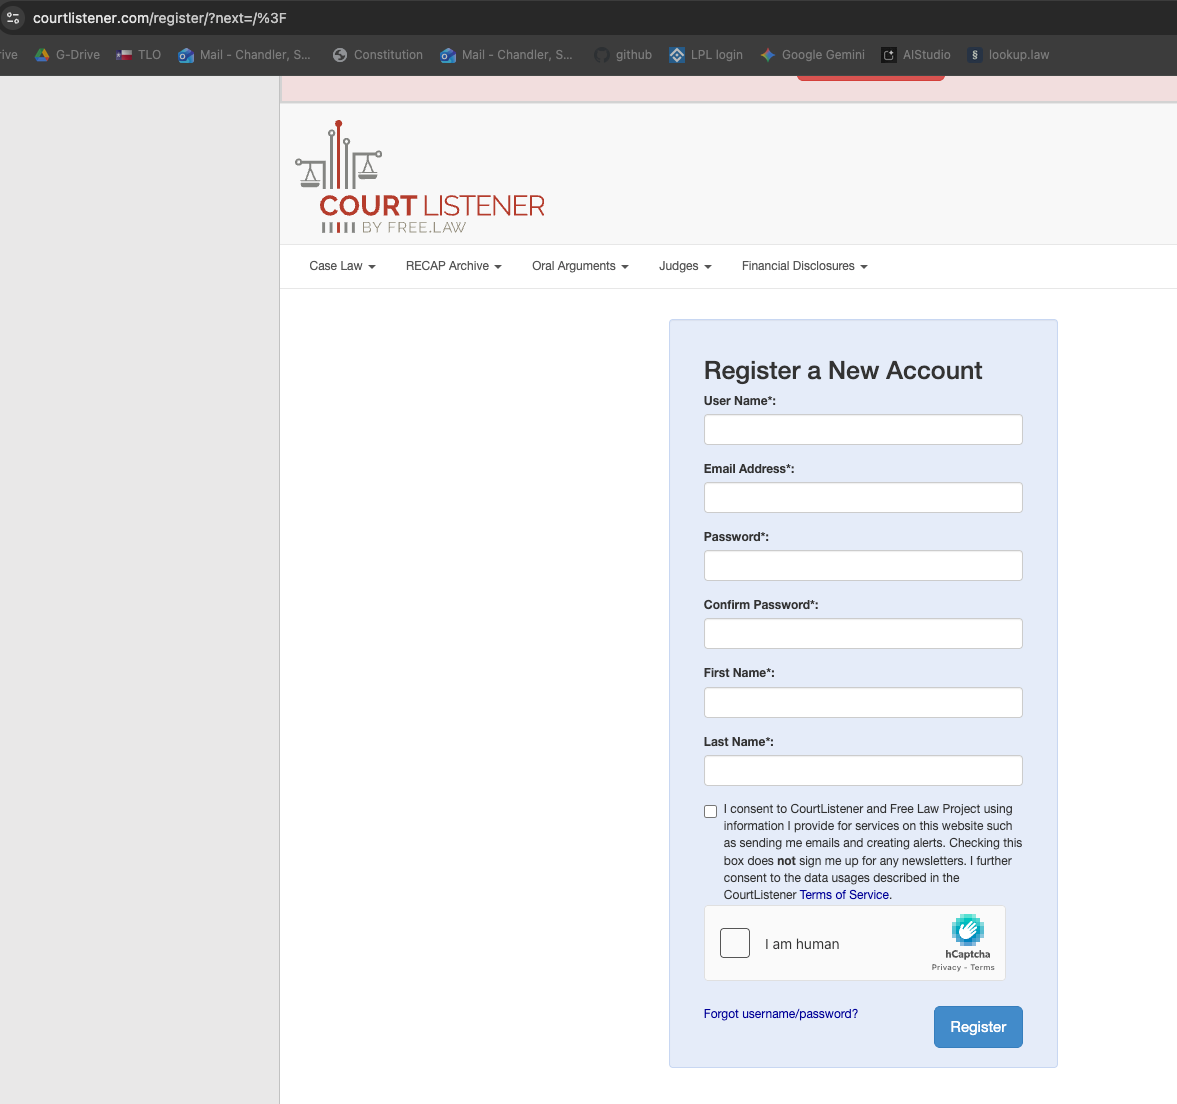
For CourtListener just go to its website and click on Sign-in/Register.
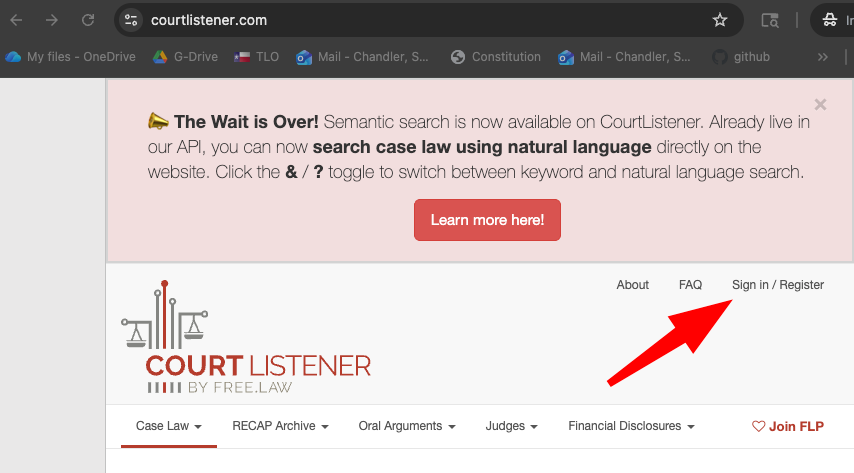
You will get a sign in form that looks like this. Fill it out and complete the authentication.
Lawve
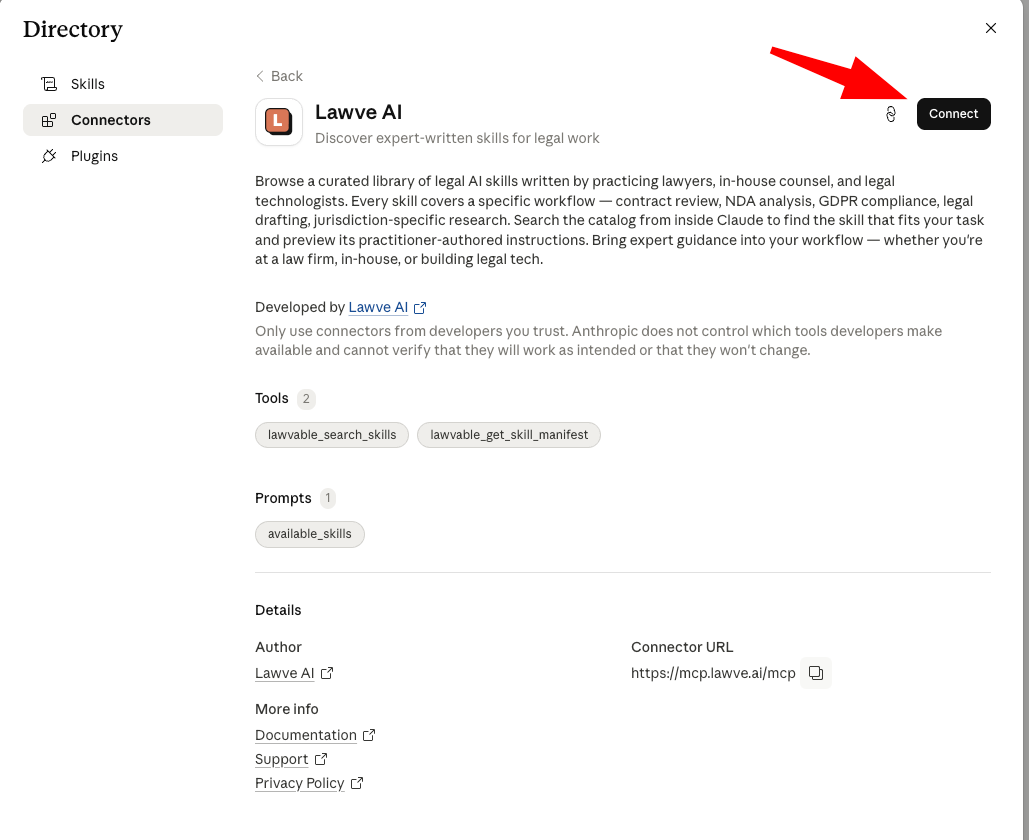
Lawve describes itself as follows; it's almost like a "marketplace" but one that is curated more carefully than the wild west of GitHub. "Browse a curated library of legal AI skills written by practicing lawyers, in-house counsel, and legal technologists. Every skill covers a specific workflow — contract review, NDA analysis, GDPR compliance, legal drafting, jurisdiction-specific research. Search the catalog from inside Claude to find the skill that fits your task and preview its practitioner-authored instructions. Bring expert guidance into your workflow — whether you're at a law firm, in-house, or building legal tech."
Go to Lawve's website. You will see something like this. Click on the little button at the right.
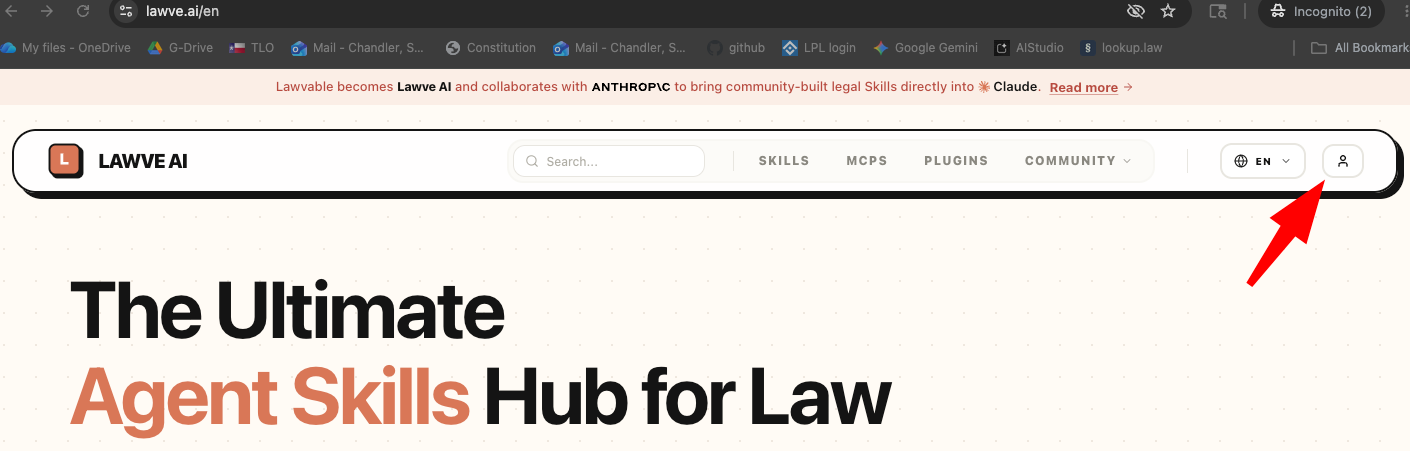
If your browser window is narrow, you won't see the icon but will instead see a little hamburger icon. Click on that and a dropdown will appear that gives you the option to sign in.

You will then see a form like this. Don't fill it out! Instead, click the Sign up link.
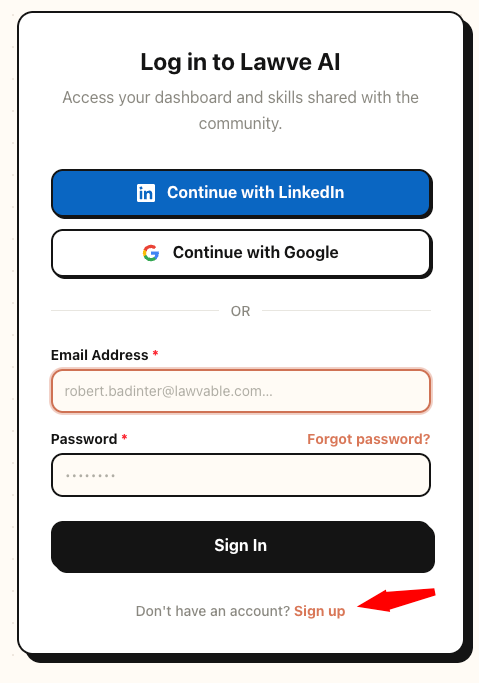
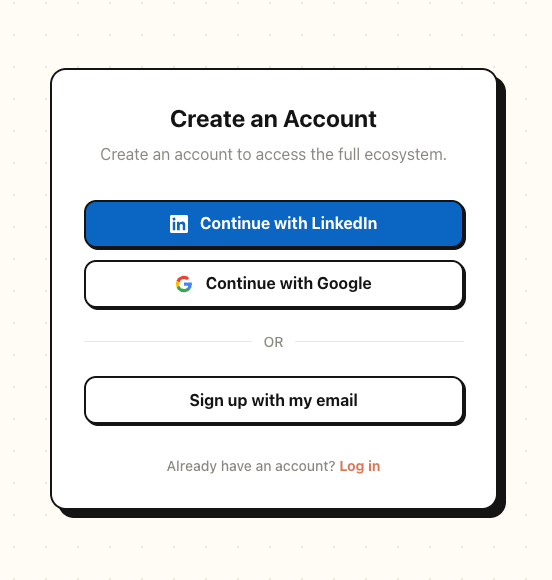
You will then get various options on how to sign up. Pick one of them and follow the conventional 2026 authorization processes.
You have now completed the prerequisites to connect Claude to these services. Now follow the instructions below.
Step 6: Adding Connectors
Get yourself back to the Customize Screen as described earlier in blog. But this time, click on the big Connect your apps button in the main panel.
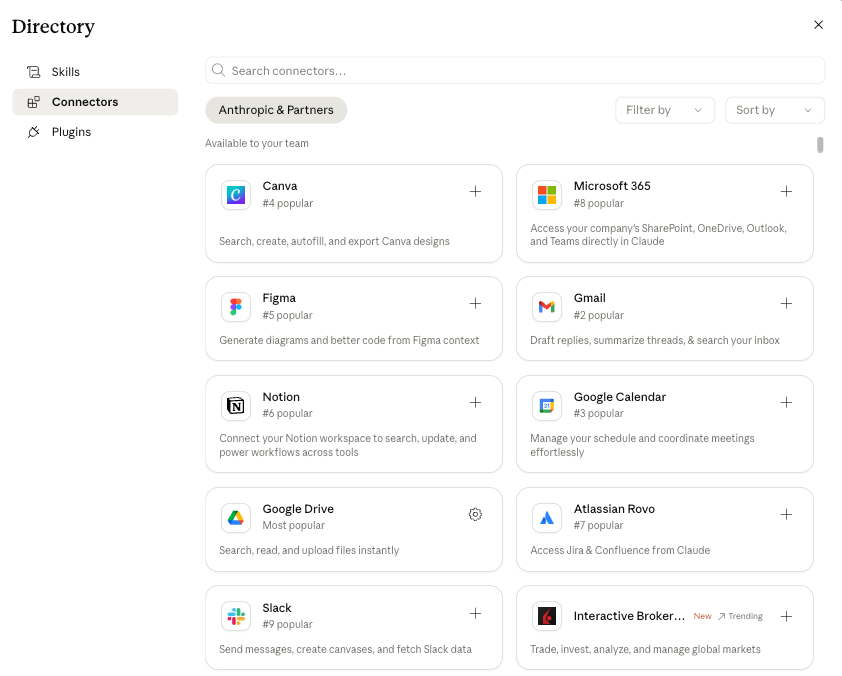
This will take you to the Directory screen with the Connectors tab selected in the left panel. You should see something like this.
CourtListener
Let's start by getting the CourtListener connector. Either scroll down through the list of connectors or type "CourtListener" into the search bar. You should see something like this:

Press the CourtListener button. That takes you to a screen describing the connector. You can see that the connector exposes various "tools." You can think of these as the activities that CourtListener will now engage in on your behalf from within Claude. For example, you can use the capability of CourtListener to search or to extract citations. Now press the Connect button to actually connect Claude and CourtListener.
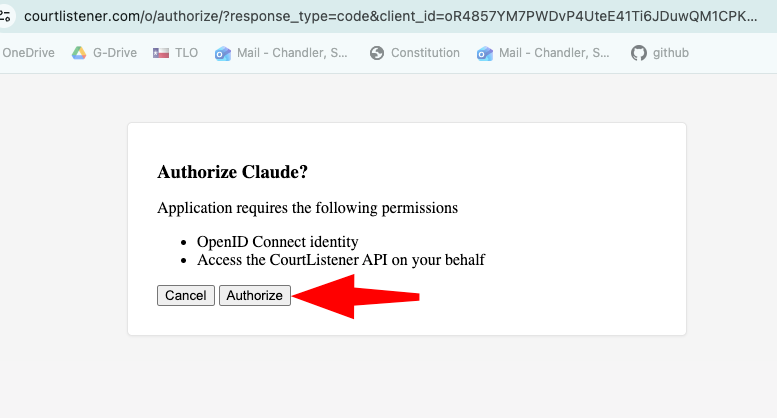
If all goes well, a new tab will open in your web browser in which you are asked to permit Claude to access CourtListener. Click "Authorize."
If all goes well, you will now have the ability to be connected to CourtListener with an option to disconnect.
Lawve
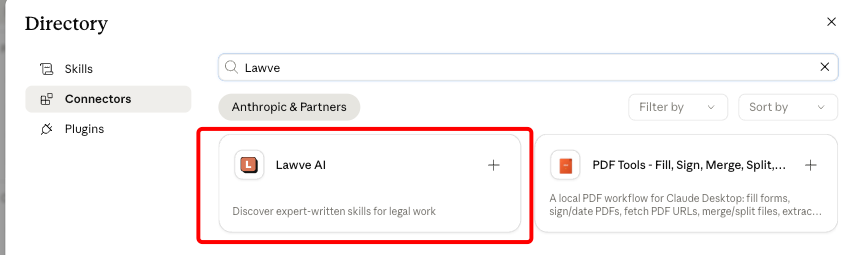
Now, if you have not already been automatically returned to the browse connectors page, go back there. This time, instead of typing CourtListener, type "lawve." As discussed above, Lawve (formerly lawvable) is a repository of curated skills, MCPs and plugins designed for broad areas of legal practice. Want to form a company in Iceland? There's a skill for that. Want to do trendy "Tabular Review" on a document similar to what you might do in Harvey? There's a skill for that.
Once again you will need to connect Claude to Lawve. Click the Connect button.
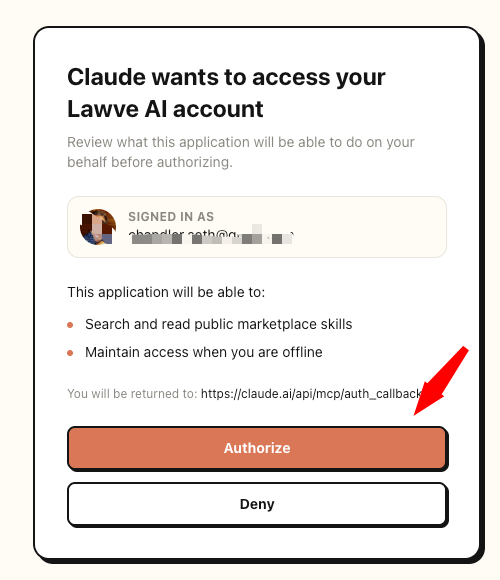
Authorize Lawve to communicate with Claude.
Step 7: Getting Skills
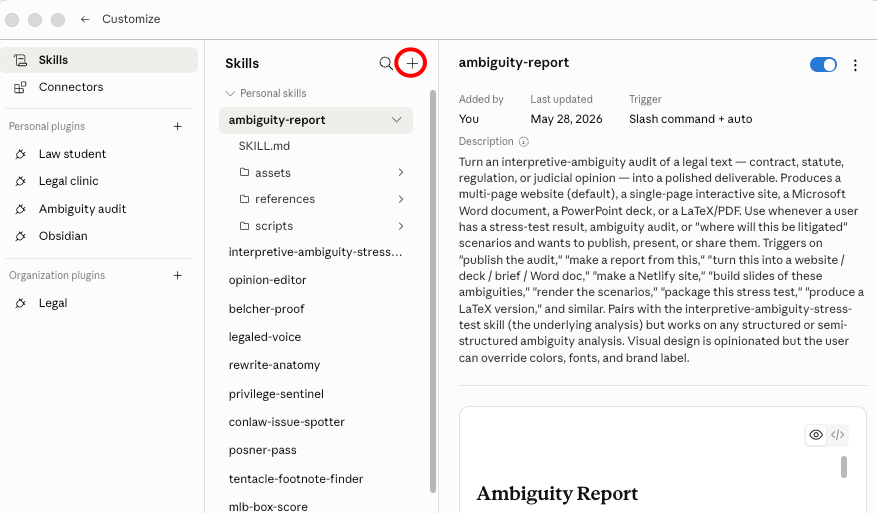
There are three ways of adding skills to Claude Desktop that live outside of a plugin: getting them from Anthropic itself, uploading a skill from file, and creating your own. The process for acquiring them is much the same as for plugins. From the main screen, click on Customize, but this time click on Skills in the left panel. You should see a screen that functions similarly to a Directory screen though it will not be labeled that way. It has a vertical listing of skills you have already integrated into Claude Desktop with an option to search for them via a magnifying glass button or to add more via a "+" button. (Why is this interface different? I have no idea.) At the beginning of your customization of Claude Desktop, you may not have as many skills already included as in my setup.
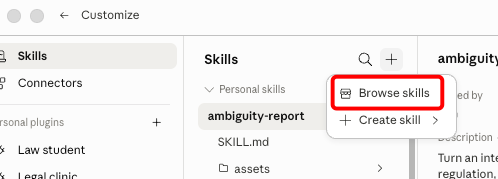
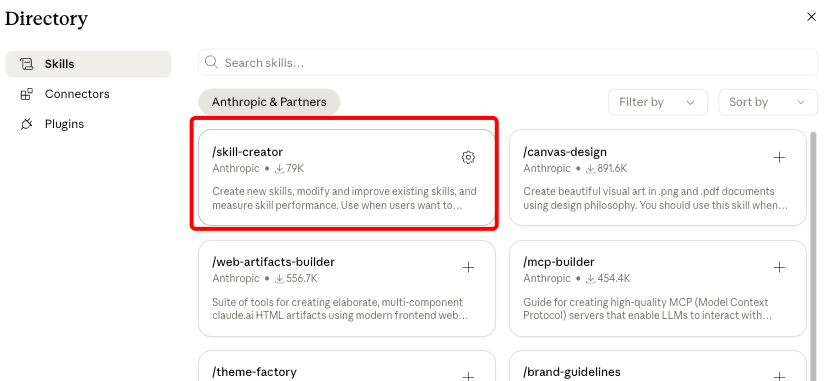
Click on the "+" button and then the Browse skills button to get the built-in skills.
Frankly, there's only one of them I find particularly useful, which is the skill-creating skill. Once you have the skill-creating skill, you can use it to help you create your own skill. Very meta!
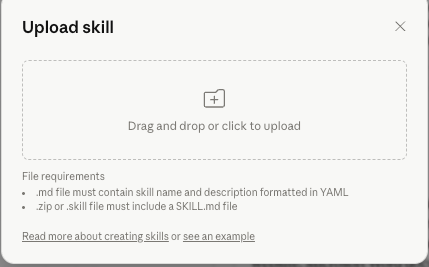
Uploading a skill from a file is trivial. From the Customize screen and the Skills tab, select "+"->"Create skill"->"Upload skill" and then find a .skill file or a .zip file in the proper format.
If you don't know where to find a skill, you can look for them at the same marketplaces.com website or you can download some of mine from my GitHub repository. The screen capture below shows how to download my eardraft skill, for example.

Step 8: Using the Plugins, Connectors and Skills
Whew. That was a lot of work. Now let's make use of our investment.
Socratic Drill
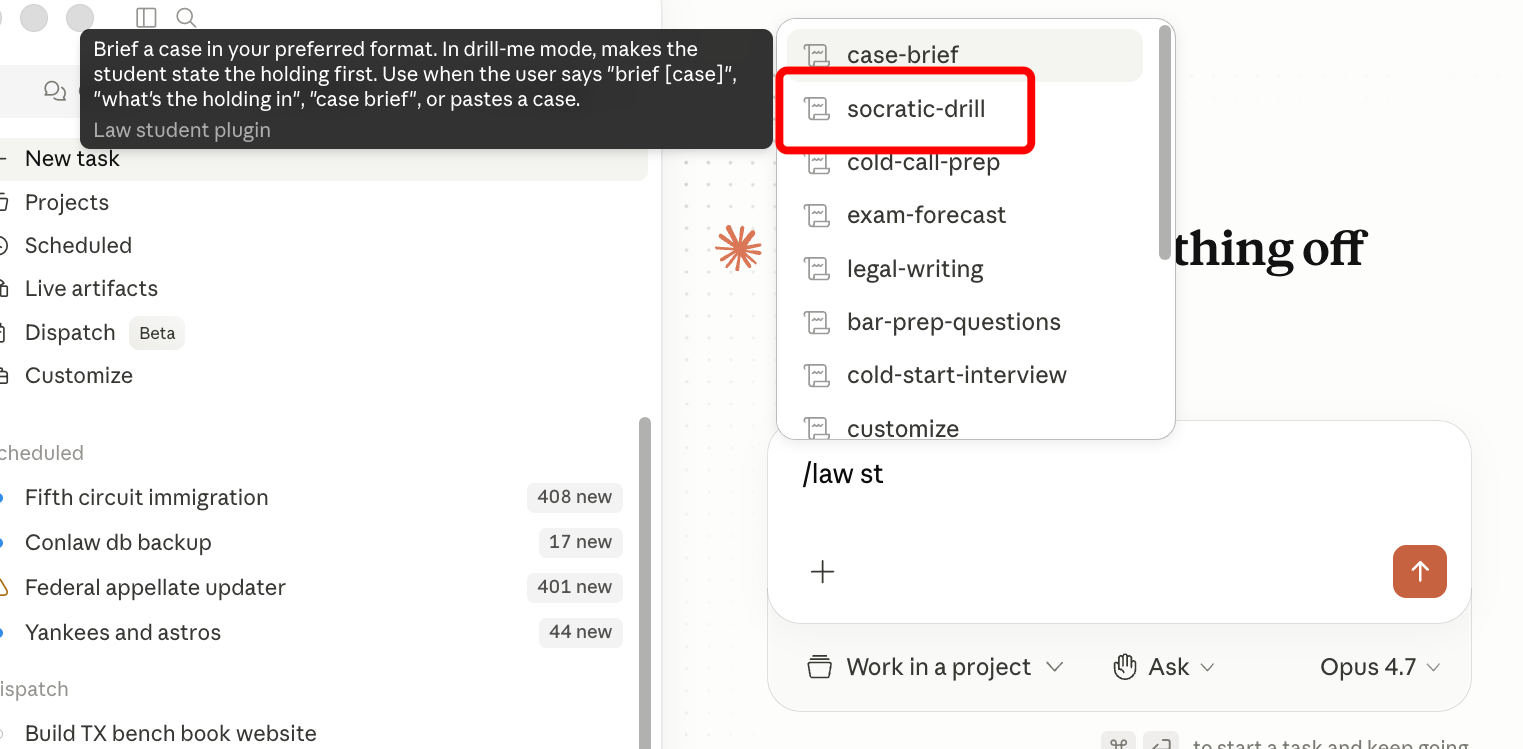
First, let's use the Law Student plugin. I want one of its skills, so I go the Claude Desktop home screen and enter the "How can I help you today" input field. To invoke a skill within a plugin, press the forward slash key and then start typing the name of the plugin that contains it. Here, I type "law st..." By the time I get this far, Claude understands I want one of the Law Student skills and offers me some auto-completion options. I pick the socratic-drill skill by clicking on it.
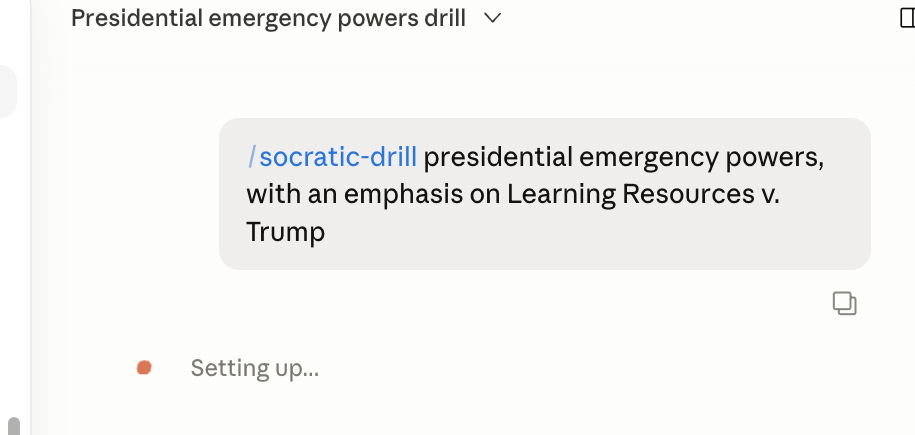
Claude confirms that I have the skill in use by writing it in blue. I can then type whatever I want to be tested on. Here I ask for a socratic drill on presidential emergency powers with an emphasis on Learning Resources v. Trump.
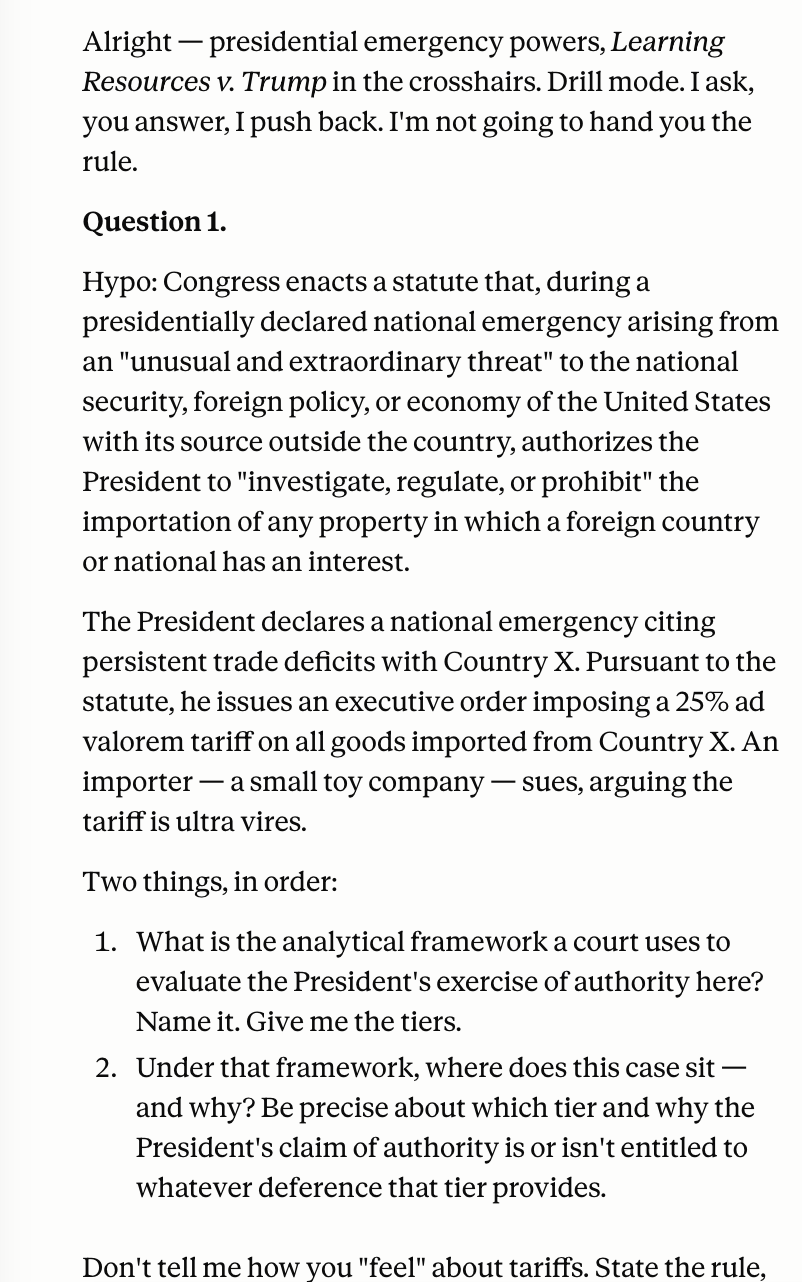
Claude then plays law professor and asks me to respond as a law student. (This is exactly the sort of subversive educational activity that the Berkeley law policy prohibits by default in many classes).
Texas Insurance Law via CourtListener
Now let's use a connector and combine its output with a skill. Notice there's no special syntax that I know of for requesting a connection. You just ask. And sometimes, even if you don't ask, Claude is smart enough to figure out that you really need a connector. Notice how I invoke the skill in the middle of the prompt by prefacing it with a forward slash.
Use the CourtListener connector to find Fifth Circuit cases from 2000 to 2003 dealing with Texas insurance law. The use the /case-brief skill to brief the most recent case that was retrieved.
Claude responds by letting you know it is loading up tools from CourtListener.
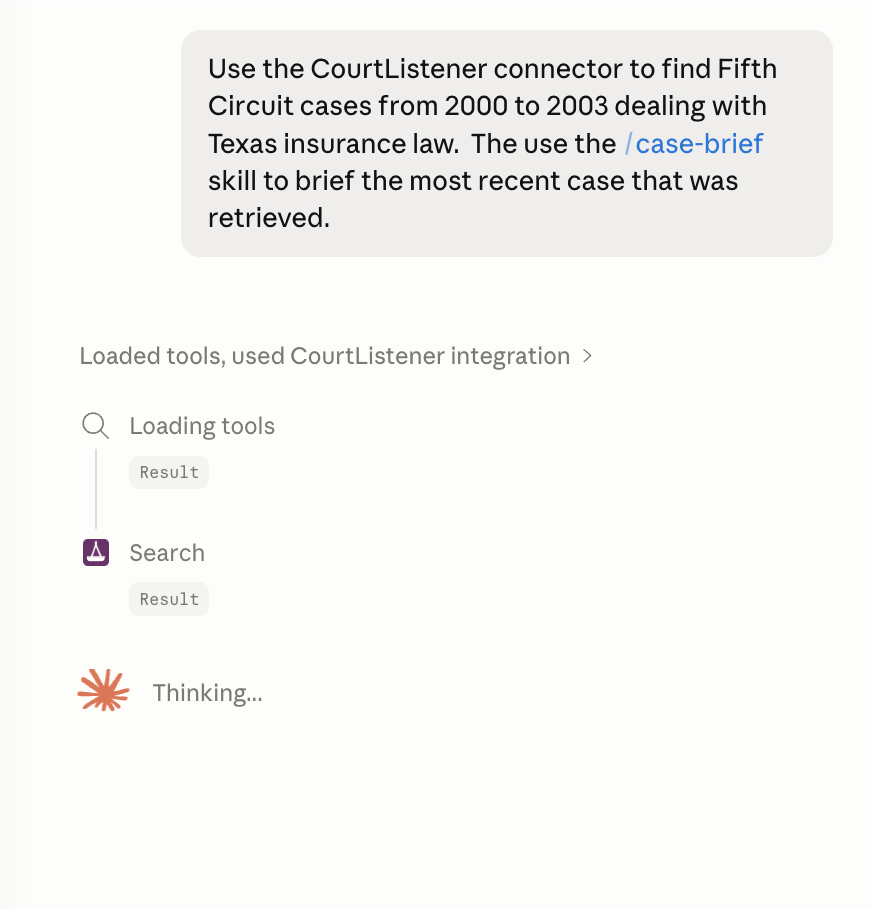
It gives a progress report.
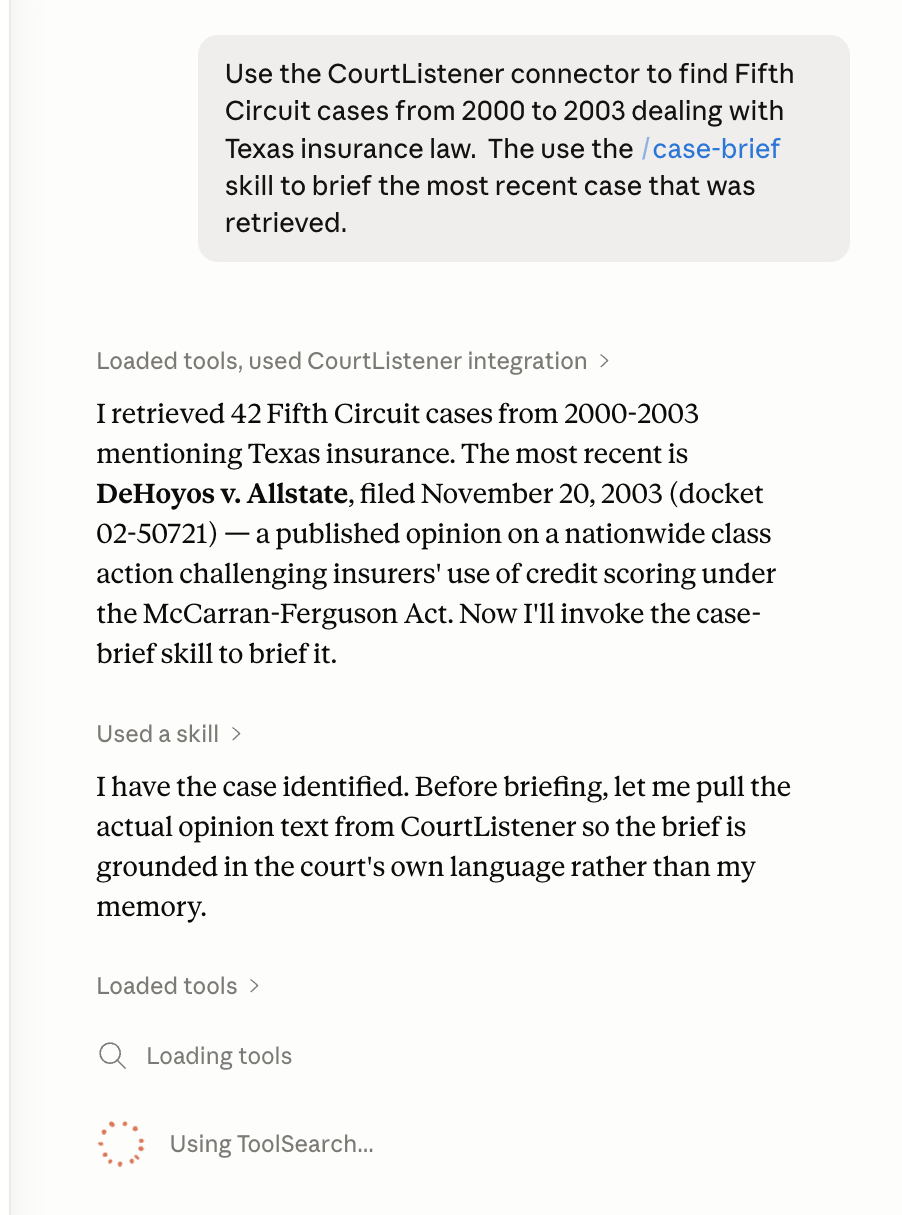
And then it invokes the Law Student:case-brief skill to explain the case to me. (Warning: doing this could result in discipline at Berkeley if I did it in preparation for a class or as part of "Conceptualization" for a paper. Just saying.)
Here's a screen capture of part of the brief produced by Claude.

Opposing Counsel Review via Lawve
Let's also use the Lawve connector. It has the Opposing Counsel review skill inside it. It isn't actually on my system so I can't call it directly with a slash command because it isn't on my system. Instead, I prompt as follows:
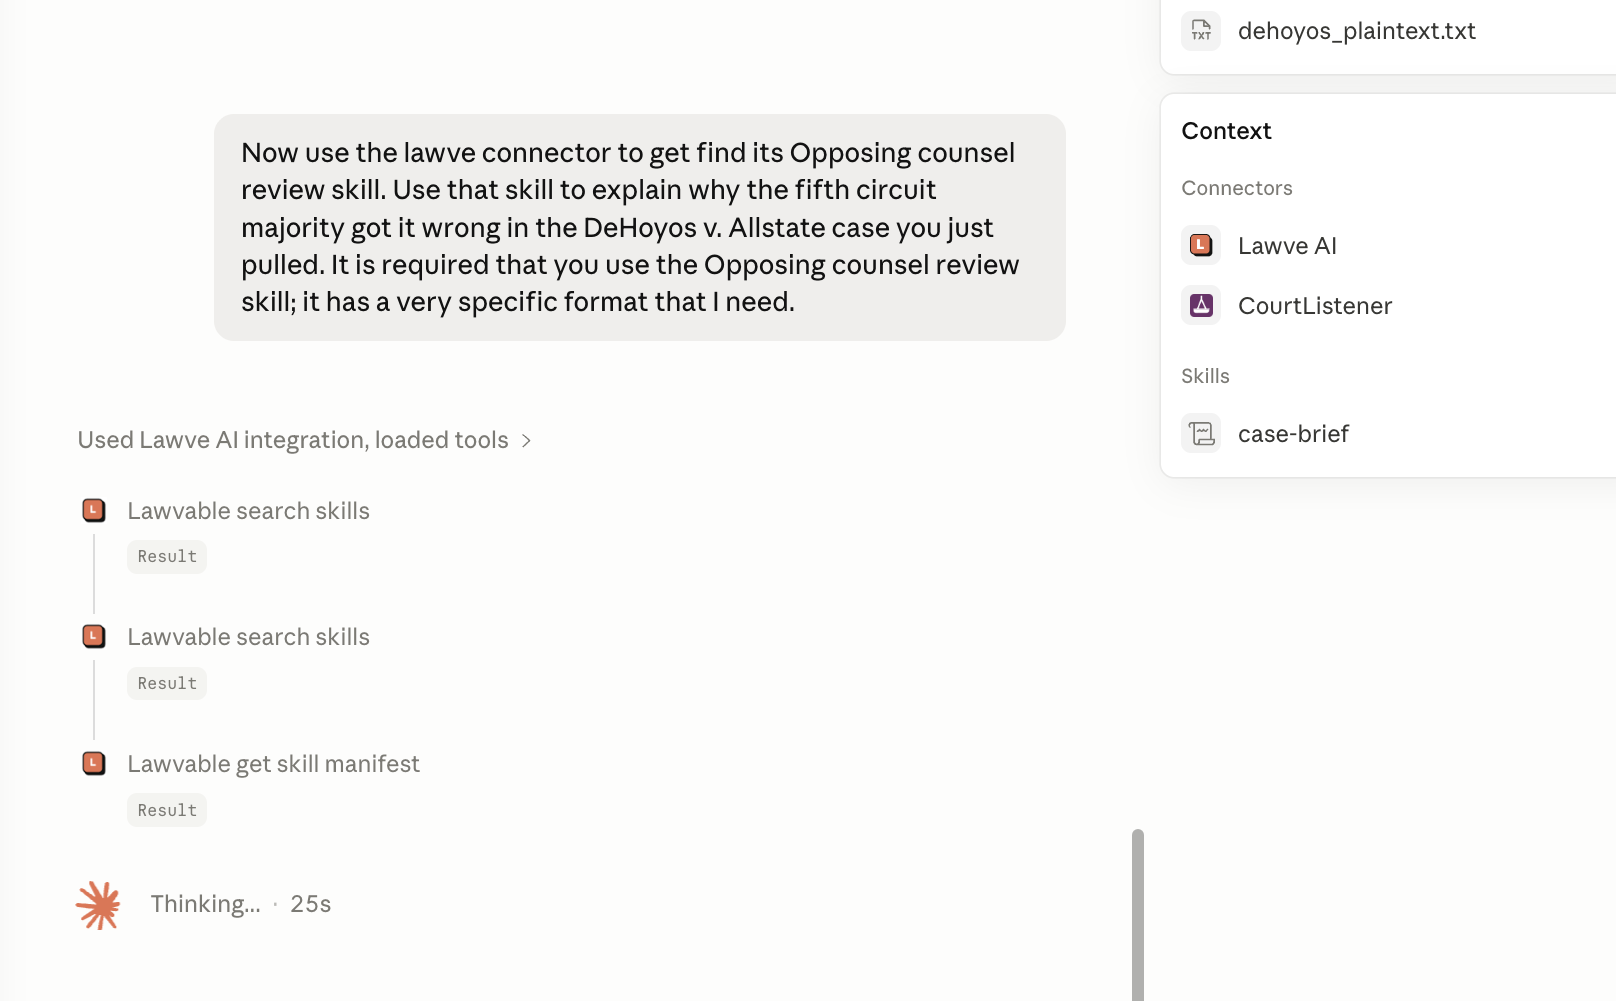
Now use the lawve connector to get find [sic] its Opposing counsel review skill. Use that skill to explain why the fifth circuit majority got it wrong in the DeHoyos v. Allstate case you just pulled. It is required that you use the Opposing counsel review skill; it has a very specific format that I need.
You can see Claude connecting with Lawve and searching its skills. You can also see a Context panel on the right showing that Claude is using both the Lawve AI connector and the CourtListener connector.
After a few minutes, Claude explains why the Fifth Circuit might have gotten it wrong in the format required by the skill.

If you are going to use a skill from Lawve frequently and do not care too much about using the very latest version, an alternative is to download the skill from Lawve and then just upload it into your system as discussed in Step 8. You can check every once in a while and see if Lawve has updated the skill and re-download and re-upload.
And more
Once you have skills (from plugins or installed directly) and connectors (standalone or bundled inside plugins), Claude effectively becomes programmable. Pull a case from CourtListener, run it through /interpretive-ambiguity-stress-test from the ambiguity-audit plugin, hand the output to /ambiguity-report, then style the resulting site with Anthropic's /brand-guidelines skill. Or use the CourtListener connector to load a portfolio of cases, draft an argument with the Persuasive Legal Writing skill from the Lawvable connector, and feed the result to the pre-installed pptx skill for a presentation. This composability is why I make Claude the hub for my legal work instead of the AI features baked into Westlaw, Lexis, Clio, or Midpage — those don't chain. This advantage grows as I increase the variety of skills, plugins and connectors available from within Claude Cowork. Even when I work in Claude for Word, where Word is the nominal center, I can still reach most of what Claude on the desktop offers.
I have not said anything here about the customization options available from the Claude Code tab of Claude for desktop. The short version: anything you can do in Cowork you can also do in Code. Cowork is simply the more approachable surface, and it handles 95% of what most lawyers and law professors are likely to be doing. Claude Code is there when you want to go further.
Step 9: Customizing Connectors
It's probably a good idea to customize the CourtListener and Lawve connectors. Get yourself back to the Customize Screen but this time, instead of clicking in the main panel, which would take you to the Directory, click the Connector icon in the left panel. I've circled the correct icon in the screen capture below.
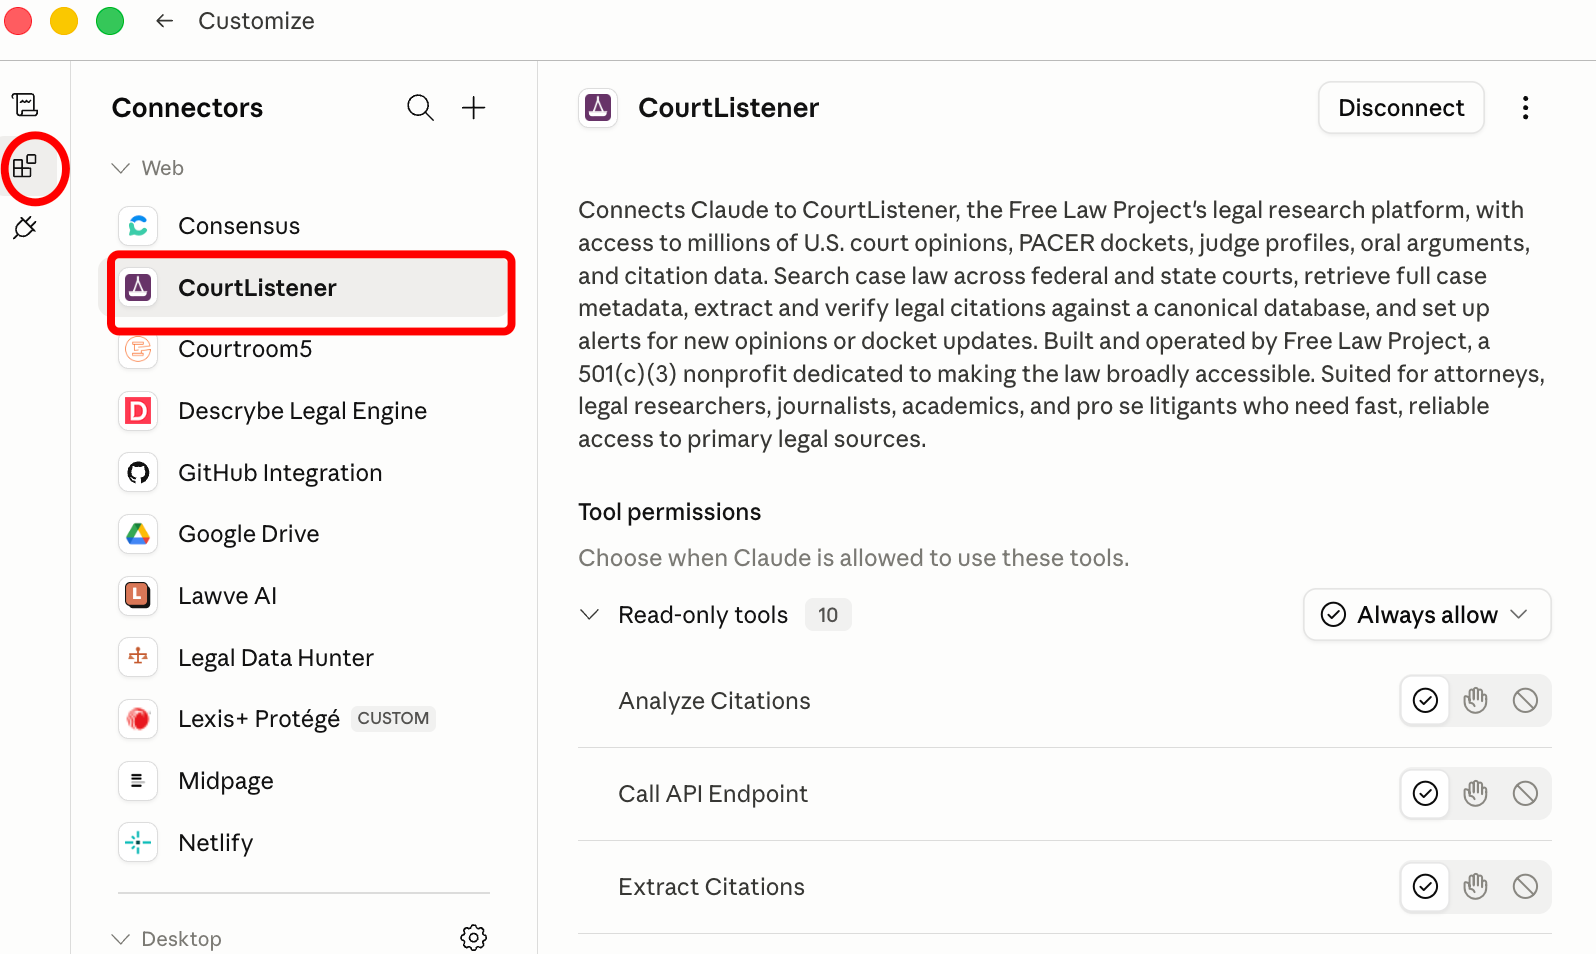
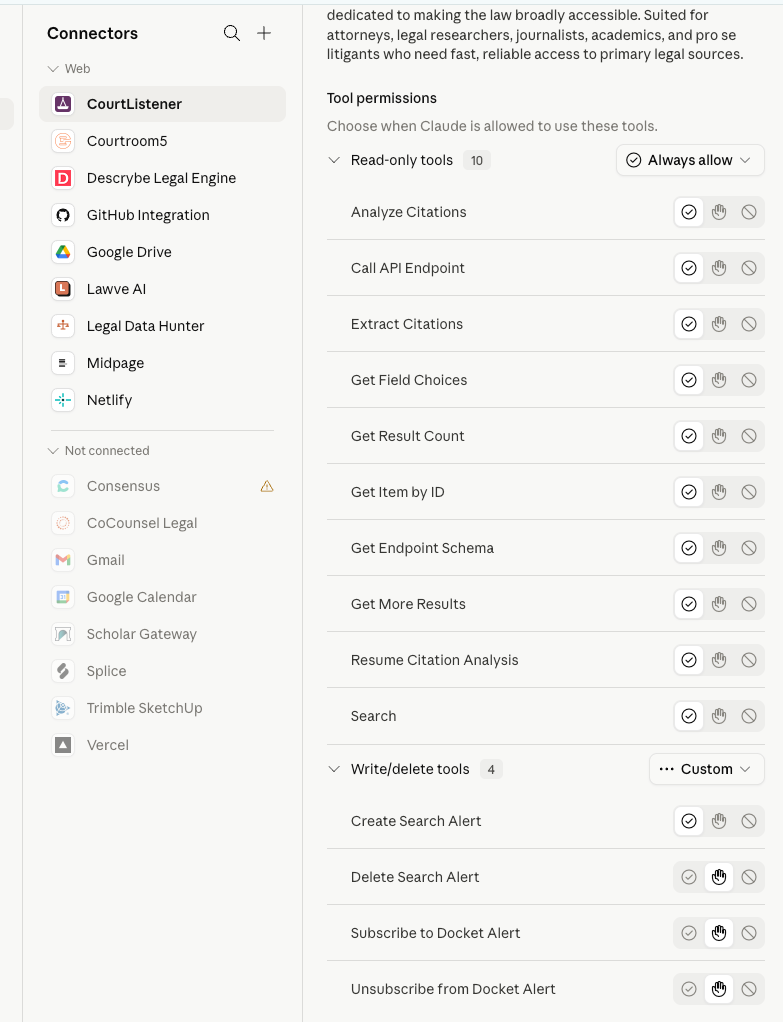
And then click on CourtListener if that is the connector you want to manage. You should now be at a Manage screen that gives you the option to disconnect the connector, to remove the connector altogether (use the three dots at the top right) or to change the permissions given to the various tools the CourtListener connector currently provides. The latter option is the one we want here.
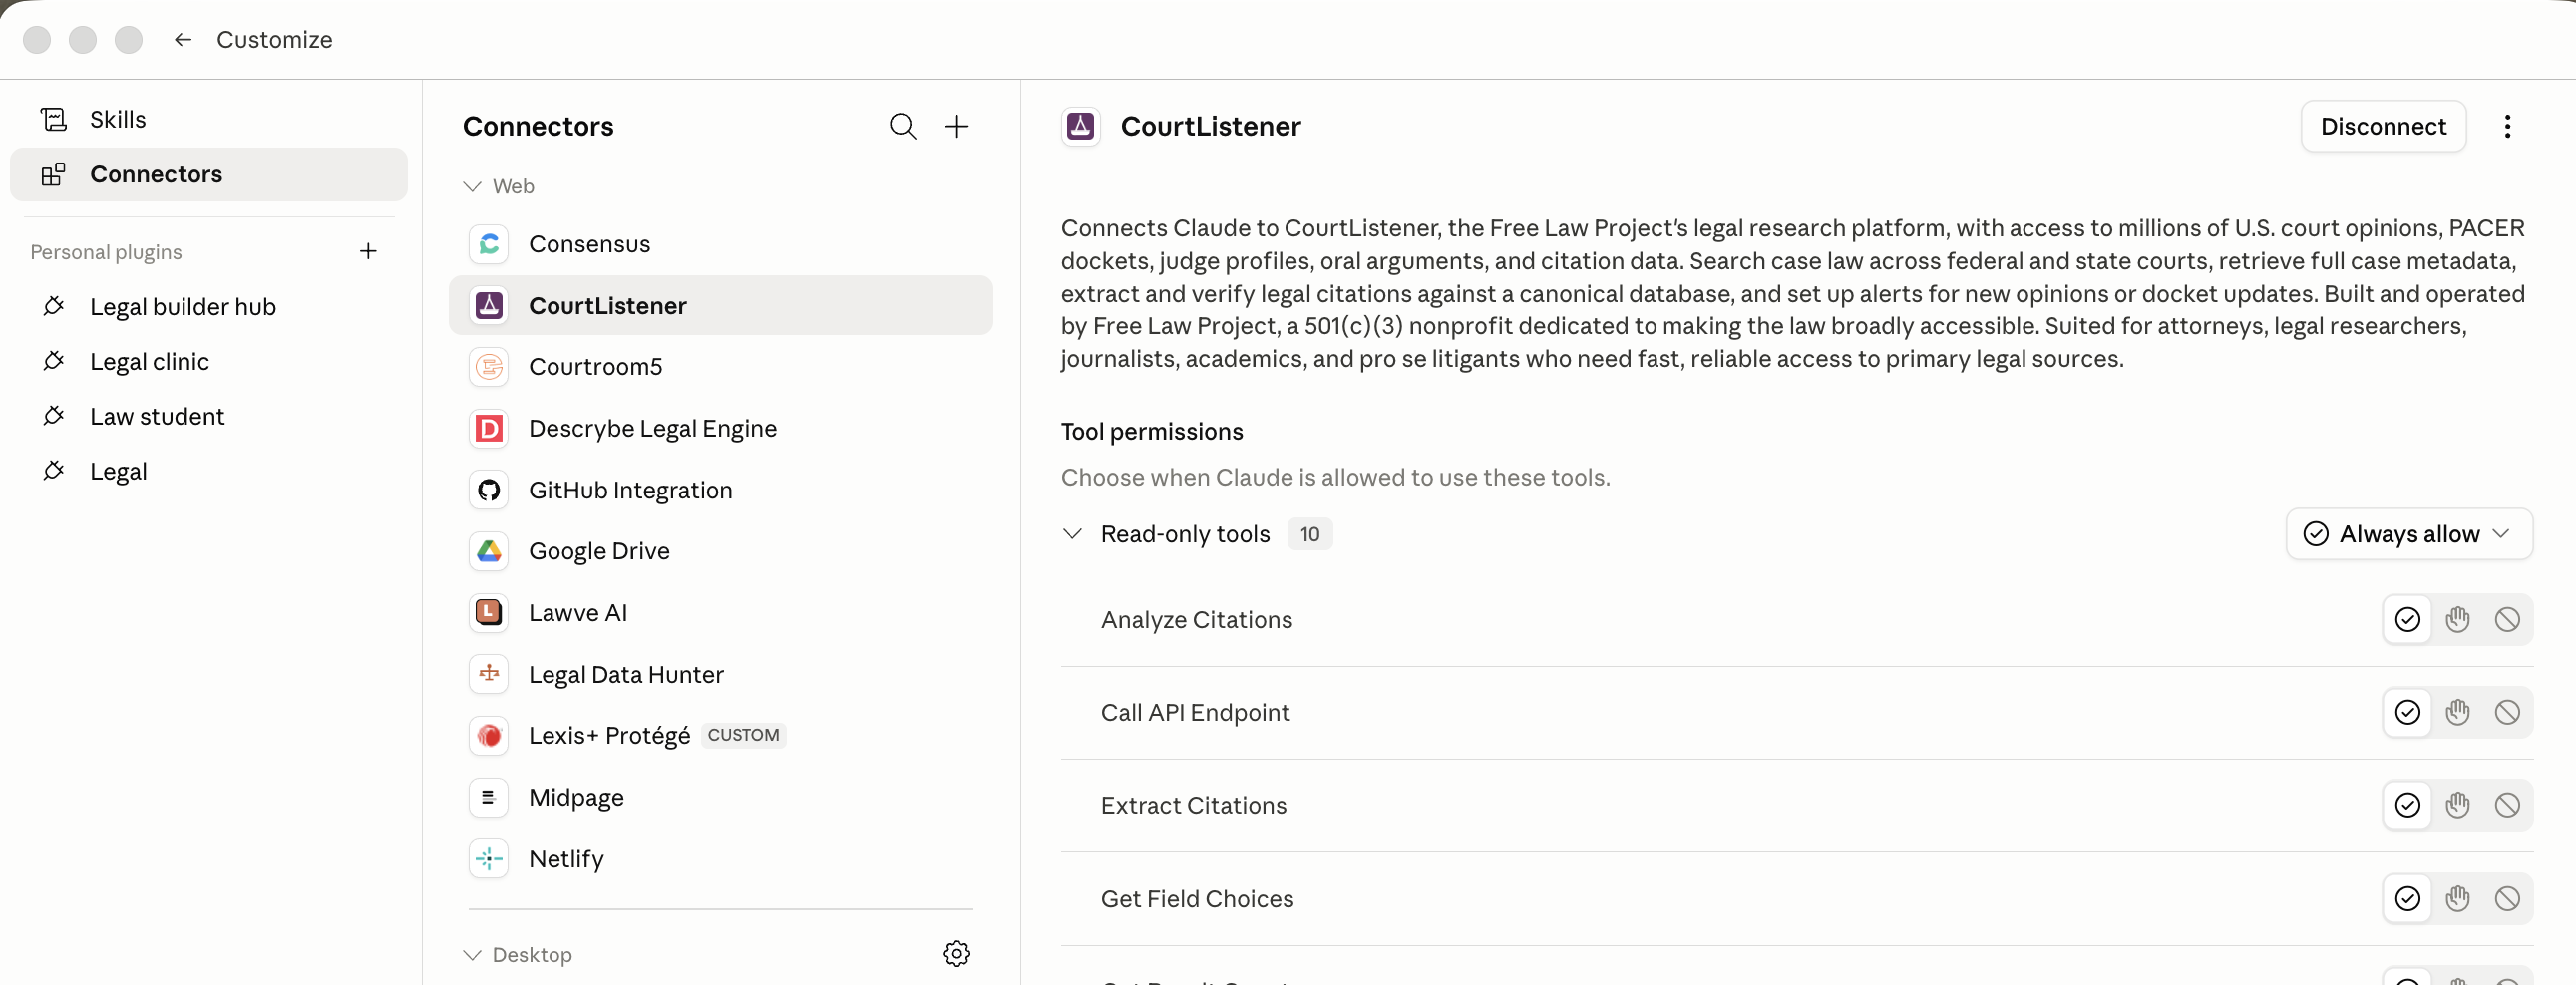
You can see that by default, for most tools you have to approve certain actions each time. You might like the extra sense of security this approval barrier creates. Or, like me, you might be more trusting. If so, click the little "Always allow" icons on the left.
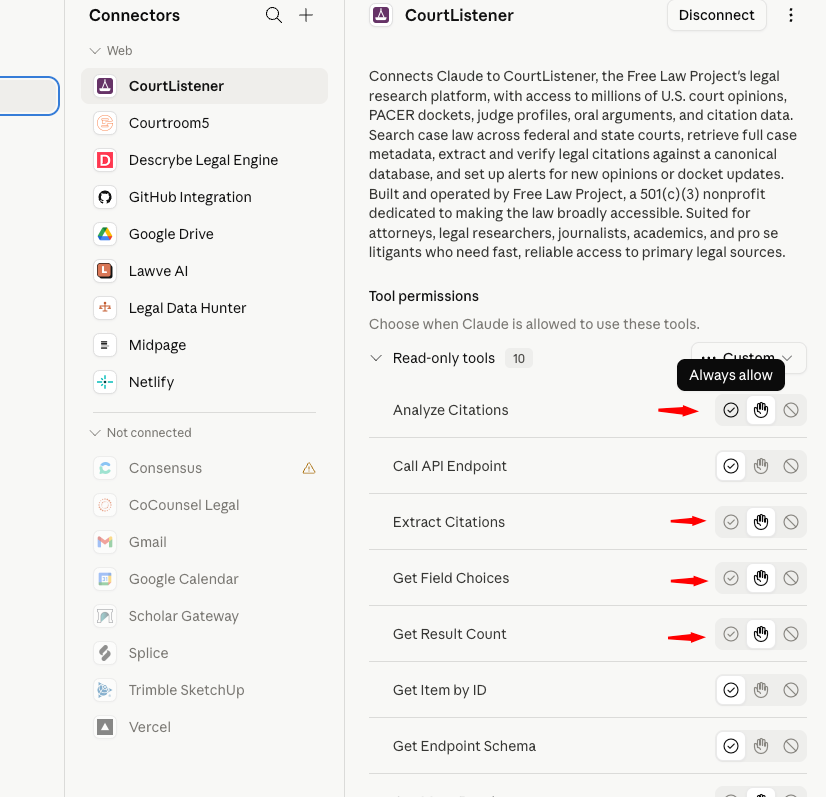
So that you end up with something like this.
You can do the same thing for the Lawve connector. Just get back to the Customize Screen, click on the manage connectors icon in the left panel and then select the Lawve connector. Alter the tools' permissions as you see fit.
Congratulations. You are done with installation and customization of new features in Claude for Legal. Please let me know in the comments of any difficulties you encountered along the way and your achievements in working in this new environment.
Appendix: How to get a GitHub account
Watch this video: https://www.youtube.com/watch?v=BgZQ-w64dDk or this one https://www.youtube.com/watch?v=0mxErQR3eVQ